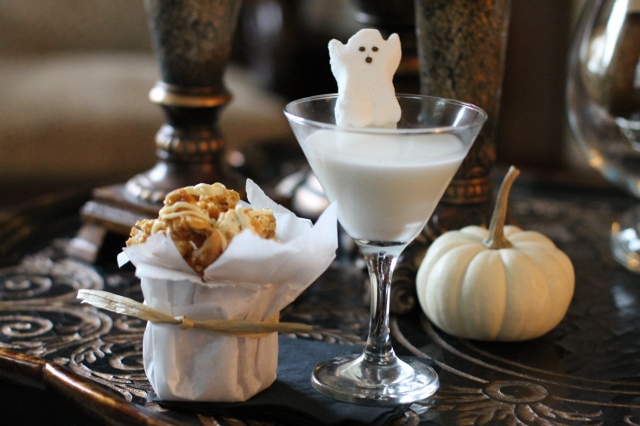
Cheers to Halloween!

Halloween is a fun time of year. Costumes, candy, parties... It's a great time to be a kid. It can also be a fun time for adults. Dressing up in costumes and throwing parties is something we never outgrow. It's a great time for everyone to get silly. I'm always up for a party and once in a while I'll put on a costume but what I love most, in all honesty, is coming up with the food and drinks. It's a chance to put a creative spin on Halloween treats. This year I decided to dress up some homemade caramel corn and pair it with a spooky drink to create an adult version of Trick-or-Treating.

I made White Chocolate Caramel Corn with Cashews from Martha Stewart Living. It's an upgrade from traditional caramel corn and worth every second of the time it takes to make it. The recipe is easy to follow and believe me, it gets gobbled up quickly so consider making two batches for a large crowd. I'll show you the steps I took so you have a visual. The complete recipe follows.

White Chocolate Caramel Corn with Cashews
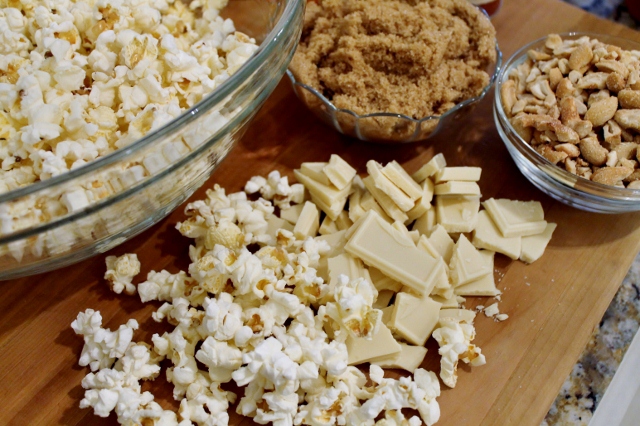
Some of the main ingredients  are white chocolate, brown sugar, chopped cashews and popcorn. I used Pop-Secret Sea Salt microwave popcorn instead of popping corn on the stove. I didn't add as much salt at the end. It turned out just fine.
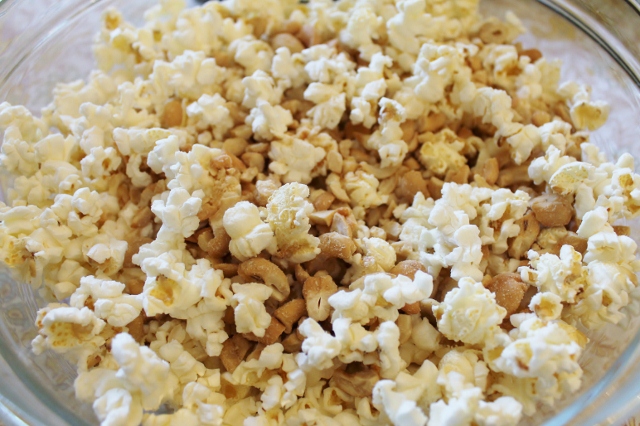
Toss the nuts and the popcorn in a large bowl and set it aside.

You're going to make the homemade caramel on the stove. You will need a candy thermometer.
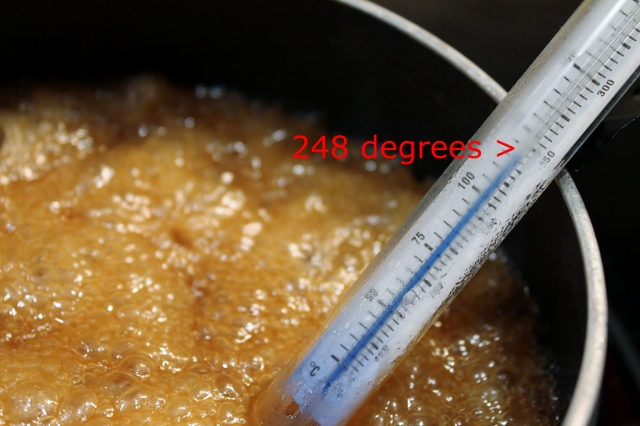
The caramel is done when the thermometer reaches 248 degrees F. You will add baking soda as soon as you remove the saucepan from the heat. The caramel will become light and airy.

 I thought it would be a sticky mess but it slides right out and onto the popcorn. Easy!

I sprayed my spatula with cooking spray before tossing the popcorn. It kept the caramel from sticking to it.

Spread the caramel corn onto baking sheets covered with parchment and bake in the oven on low heat.
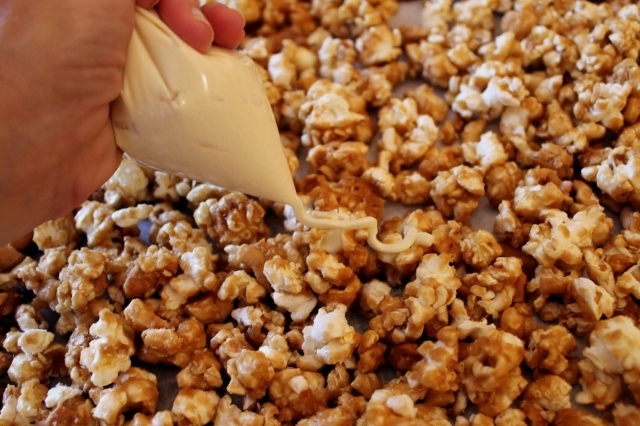
After the caramel corn is baked and is completely cooled, drizzle with melted white chocolate. 
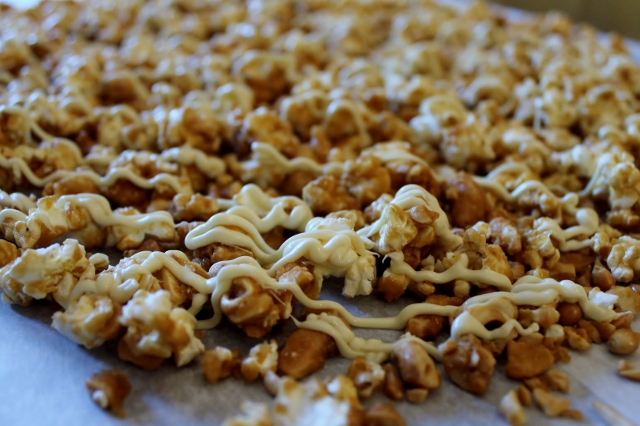
Refrigerate the caramel corn until the chocolate hardens.

Serve or store in airtight containers. I made individual serving cups by wrapping parchment paper around a glass and securing it with a piece of raffia (remove the glass after you tie with raffia).

Liquefied Ghost Martini

Don't let the ghost fool you! This silly little drink is "adults only" with vodka mixed into the vanilla and cream concoction. Take it easy, because it only looks innocent!

Happy Halloween!

Leslie xo

White-Chocolate Caramel Corn with Cashews

Author: Adapted from Martha Stewart Living
Ingredients
  • 12 cups popped popcorn
  • 1 1/2 cups chopped cashews
  • 1 stick plus 2 tablespoons of unsalted butter
  • 1/2 cup light corn syrup
  • 1 1/4 cups packed light brown sugar
  • 1/4 teaspoon baking soda
  • 5 ounces white chocolate, chopped
Instructions
  1. Preheat oven to 250 degrees.
  2. Mix popcorn and nuts in a large bowl. Melt butter in a saucepan over medium heat. Stir in corn syrup, sugar, and 1/2 teaspoon salt, and cook until sugar dissolves, stirring once or twice. Raise heat to high, and bring to a boil (do not stir). Boil, without stirring, until a candy thermometer registers 248 degrees, 2 to 4 minutes. Remove from heat, and stir in baking soda.
  3. Pour caramel over popcorn mixture, stirring to coat thoroughly. Transfer to baking sheets lined with parchment paper, spreading in a single layer. Bake 45 minutes, stirring twice. Test doneness by removing a few pieces of popcorn from oven; if they crisp within 1 minute, popcorn is ready. Remove from oven, and immediately sprinkle with remaining salt. Let cool completely.
  4. Place chocolate in a heatproof bowl set over a pan of barely simmering water. Stir until melted and completely smooth. Fill a small resealable plastic bag with chocolate, and snip a tiny hole in 1 corner. Drizzle chocolate over caramel corn. Refrigerate until chocolate is set, about 10 minutes.
  5. Break apart and serve. Store in an airtight container for up to one week.
Liquefied Ghost Martini

Author: Adapted from Cooking Channel
Ingredients
  • Ingredients
  • 2 oz. vodka
  • 1 oz. vanilla simple syrup
  • 1 oz. cream
  • 2 oz. club soda
  • Marshmallow ghost (optional)
Instructions
  1. Mix vanilla simple syrup, cream, vodka and soda.
  2. Serve in a martini glass.
  3. Slice marshmallow ghost on bottom half and place on martini glass as garnish.
  4. Cheers!
Favorite Things

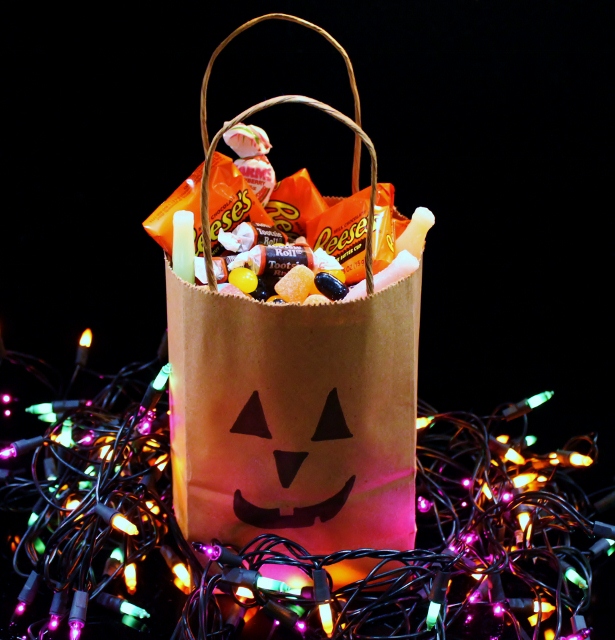
Halloween seems to be in full swing this week. Parades are marching, kids are Trick-or-Treating and costume parties are going on. It's a fun time of year. I have fond memories of running through my neighborhood as a kid with my sisters on Halloween night. We wore our store bought costumes that came in a box and carried our plastic Halloween bags to collect our candy. It was simple and it was fun. The best part of the night was running home when Trick-or-Treat was over so we could dump out all of our loot and put it into piles to count it. My kids, although they wore cooler costumes, did the same thing. It was all about the candy! So as the celebrations continue and your sweet tooth starts calling, enjoy the season and have some fun! Halloween only comes once a year! I'll be digging into my favorites too! Happy Friday!

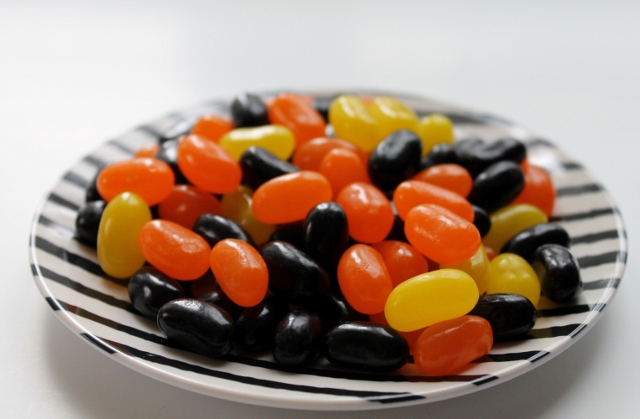
Black & Orange Gumdrops ~ a current favorite

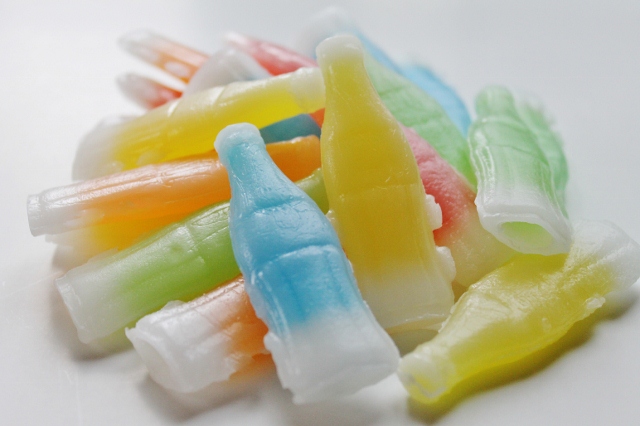
Wax Bottles ~ back in the day

Reese's Peanut Butter Cups ~ then & now

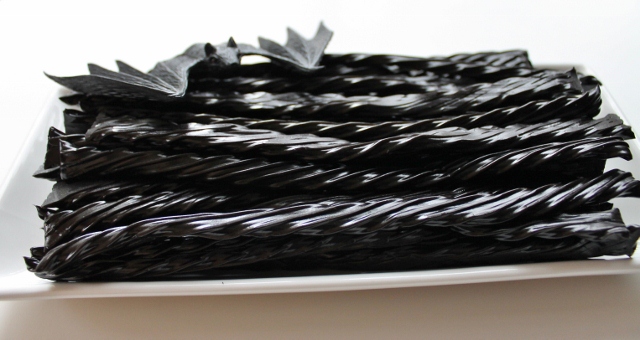
Black Licorice ~ always at the party

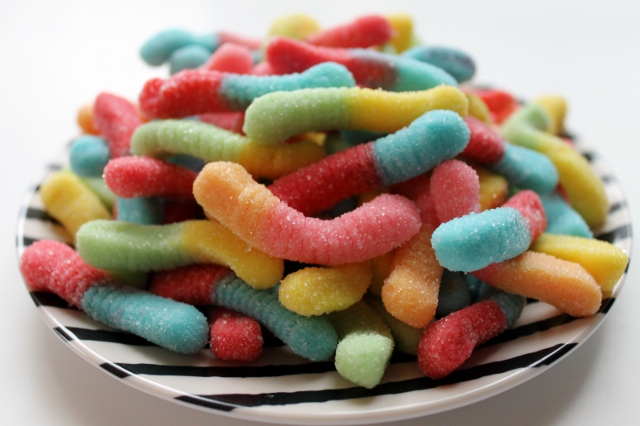
Sour Gummy Worms ~ believe it or not, a current favorite

Charms Blow Pops ~ always a great find in the Trick-or-Treat bag

Black, Orange & Yellow Jelly Beans ~ a forever favorite

Have a wonderful weekend! 

Leslie xo


Photos by Leslie Reese

Simple Dip-Dye Scarf

I was recently flipping through the October issue of my Martha Stewart Living magazine and was intrigued with some of the DIY projects that were scattered throughout the pages. I decided it was time to put one of them to the test to see if it really was as simple to do as they make it look. I decided to try a dyeing project. It was a how-to on creating a blue streaked scarf using a Dip-Dye method. There were very few materials or steps involved so I figured it had to be easy. I was right and the result was beautiful. Here is what I did.

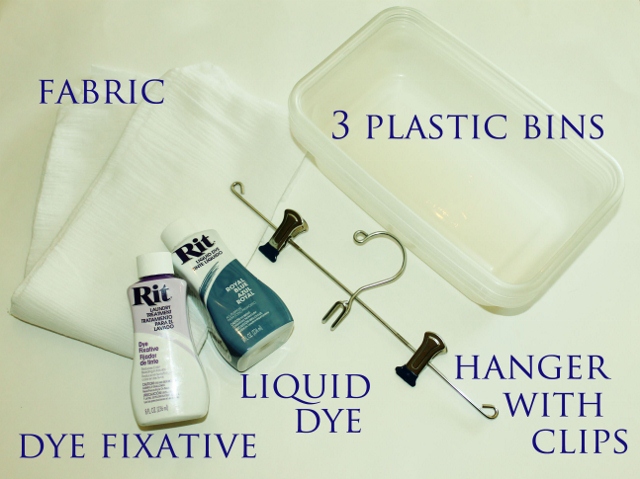
Materials I used:

  • Fabric ~ I used cotton gauze fabric that was 80 inches long and 40 inches wide. I cut it in half lengthwise and had enough for two scarves. I could have also used a white scarf.
  • Liquid Dye ~ I used the color Royal Blue for this scarf
  • Dye Fixative
  • Clothes hanger with clips
  • 3 plastic bins
  • Iron

I folded my fabric accordion style and pressed it with an iron.

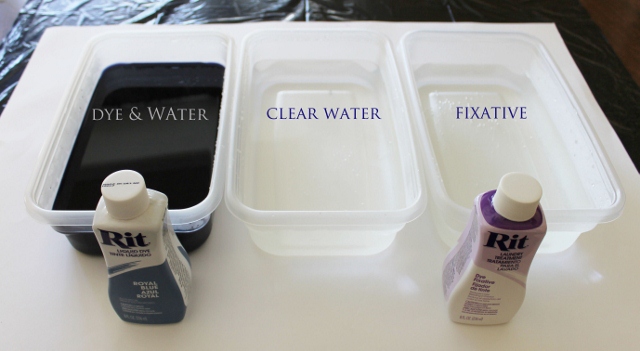
I mixed the dye according to package directions in the first bin. I put plain water in the second bin and I mixed the fixative according to package directions in the the third bin.

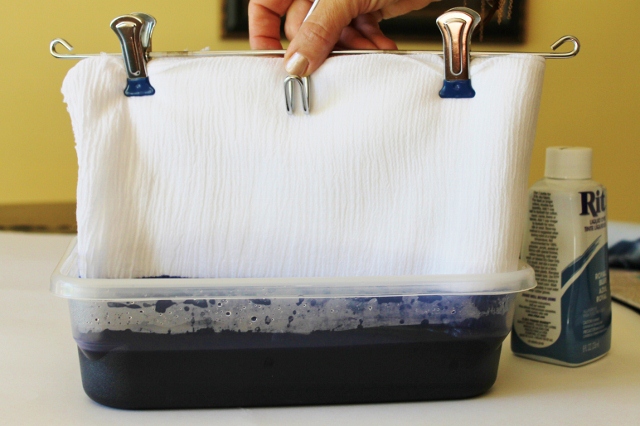
I folded the fabric in half width-wise and then clipped it to the hanger. I dipped the folded edge of the fabric into the first bin (the one with the dye).

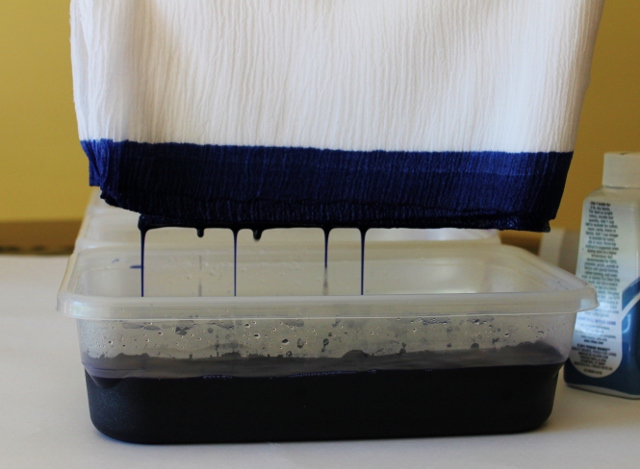
I waited for the majority of the liquid to drip into the bin before moving to the next one.

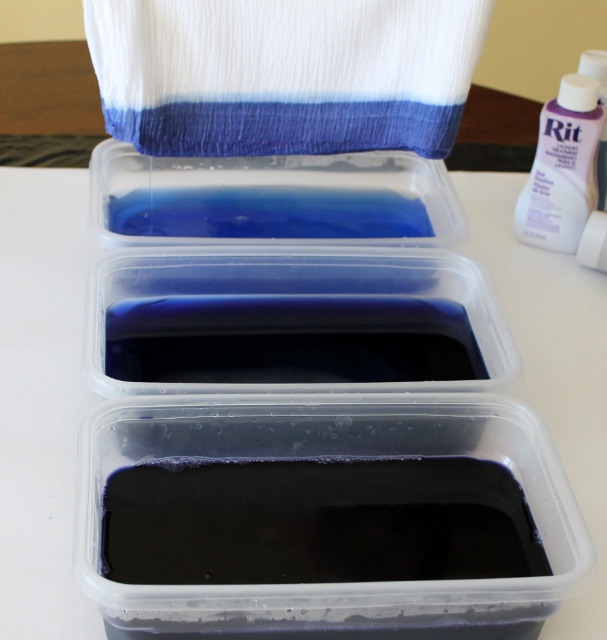
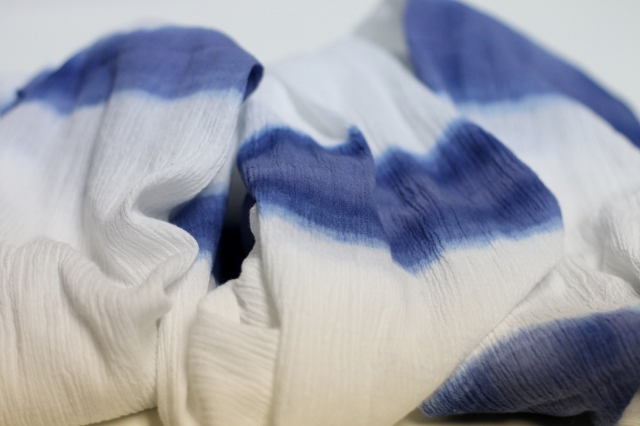
Next I dipped the fabric into the second bin, which had plain water in it, to rinse the dye out. The dye quickly colored the water. When I put the fabric into the water past the dye line, the dye soaked up into the fabric resulting in a light blue top stripe. It wasn't intentional but I liked how it looked.

Next, I dipped the fabric into the third bin. The fixative in the water sets the dye.

When I was finished dyeing the fabric, it needed a place to dry. With gloves on, I carefully squeezed out the excess liquid. Then, I hung the clothes hanger right on the chandelier in my kitchen. It was hanging over the bin so it could drip and the table was covered with plastic and paper.

It took about a day to dry. Once it was dry, I unfolded it and pressed it slightly.

I love the idea of dip-dyeing. It was simple and fun. I guess those DIY projects are as easy as they look! If you want to check out the actual How-To on this project look in the October issue of Martha Stewart Living magazine or the browse the dyeing projects at Martha Stewart online.

Have fun!

Leslie xo

Favorite Things

This past Monday, I had a wonderful opportunity to travel to New York City to attend the Martha Stewart Weddings Bridal Market Party on behalf of Best Friends for Frosting, an online dessert magazine. As a contributor for BFFF, I was asked to represent our team at the event. It was an assignment I was happy to accept. The evening was spectacular and I am still pinching myself because I feel like I was dreaming. You can read about my experience at Best Friends For Frosting but for today's post, it only seems fitting that I share my favorite moments from the night. I hope you all had a great week. Happy Friday!

The Party

I was so excited that I could take two of my daughters, Lynsie and Elizabeth, with me. We had so much fun together.

We were fortunate enough to be standing front and center when Martha Stewart and Darcy Miller kicked off the evening.

I was thrilled to meet Darcy Miller, Editorial Director for Martha Stewart Weddings

We were honored to be guests at the (unofficial) wedding ceremony of Alex Pelling and Lisa Gant, the couple behind the blog 2 People 1 Life.

Watching famous cake designer Sylvia Weinstock personally deliver and serve a cake she designed for Alex and Lisa.

Chatting with American jazz musician Steve Tyrell.

I just loved the flowers on the wedding cake.

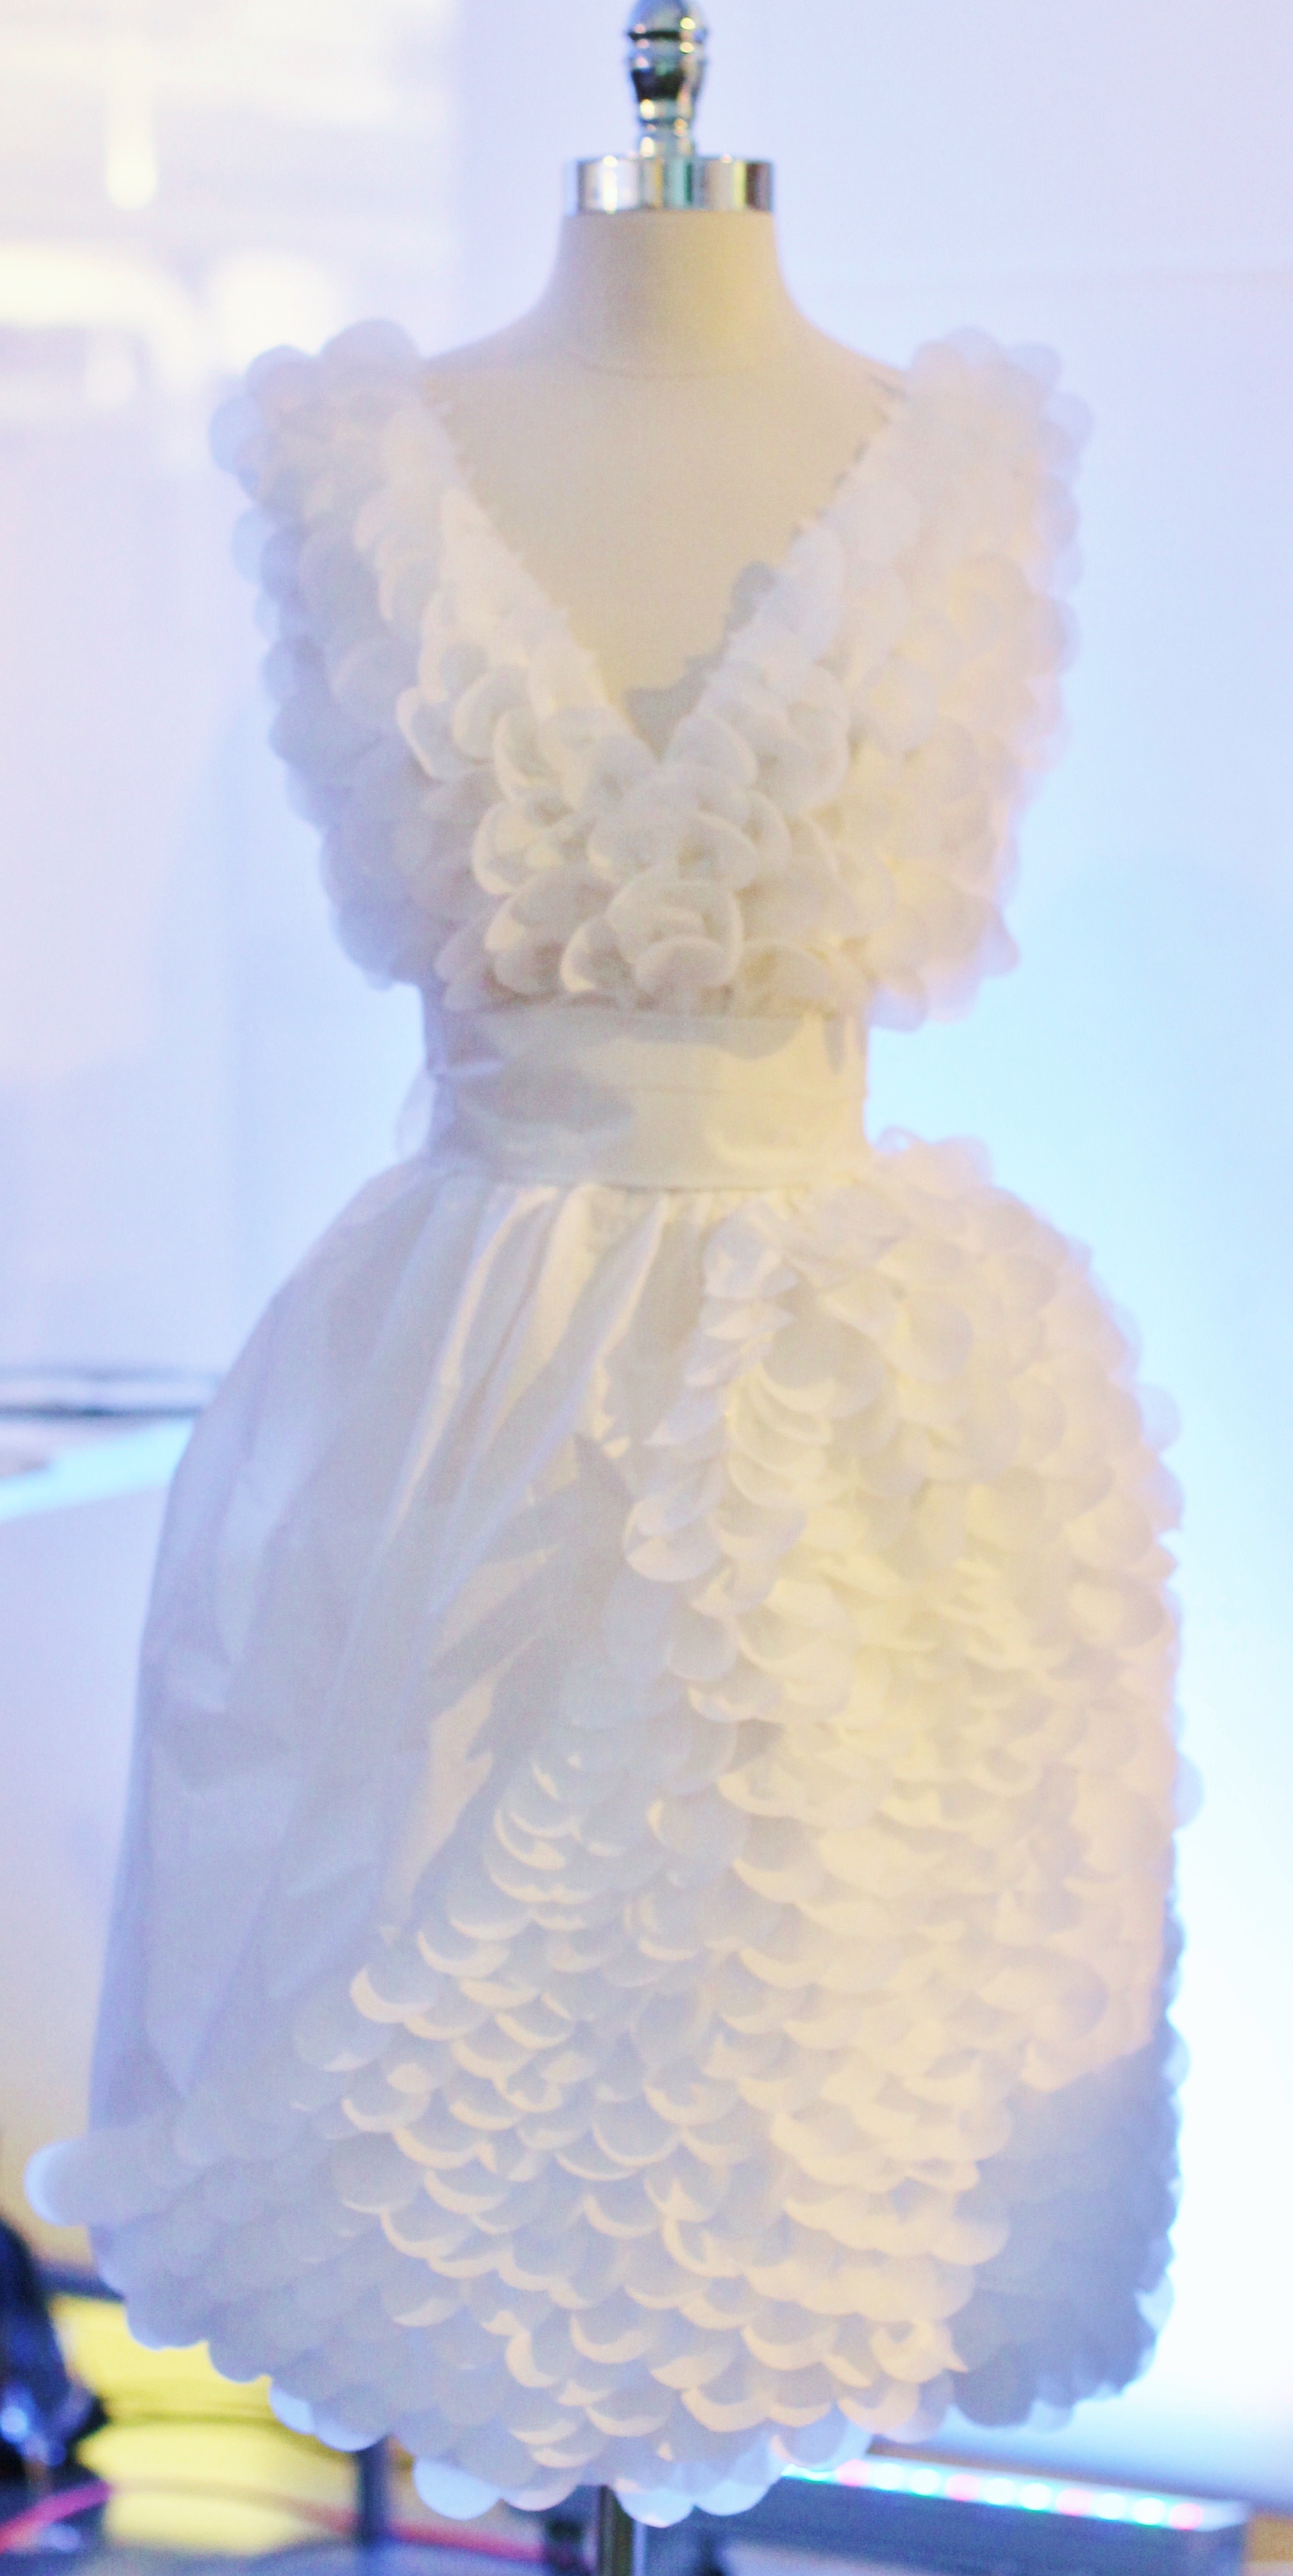
A paper dress from Paper Posy Designs.

The sugar flower I brought home from the Sugar Flower Cake Shop.

The amazing talent of Sandy Patangay, from Creme Delicious. I was amazed at the detail in her Henna Cake.

Martha Stewart Living Behind the Scenes Tour

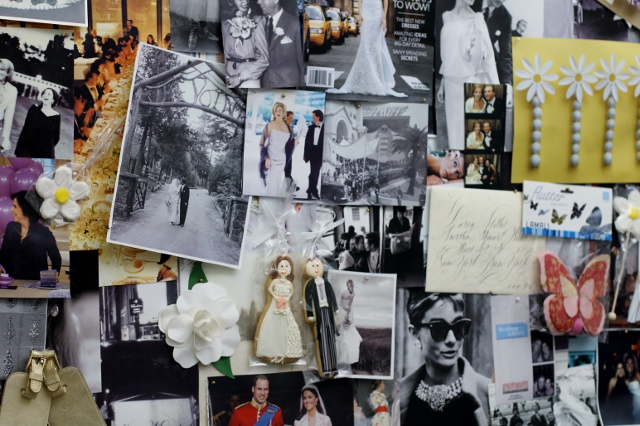
The fascinating inspiration boards made to create the magazine pages at Martha Stewart Living.

Cake stands, cake stands, cake stands!

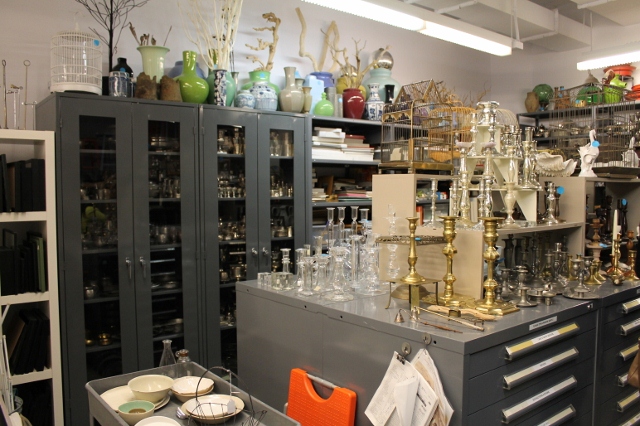
The prop house for magazine photo shoots.

A gingerbread house that was in the middle of construction. I wonder if we will be seeing this in the holiday edition of Martha Stewart Living.

The lesson for this week is Never Say Never! Have a wonderful weekend!

Leslie xo

Photos by Leslie Reese

Nut Free Basil Pesto

We had our first freeze warning in Central Pennsylvania this past weekend and it was a subtle reminder that summer is over and winter is just around the corner. As you may know, I have several different herb plants growing on my patio outside. I love cooking with them but because of the climate, I can only enjoy using my own supply during the warmer months. My basil plant was full of leaves and looked so healthy but I knew its days were numbered so I figured it was a good time to bring it inside and make some pesto. 

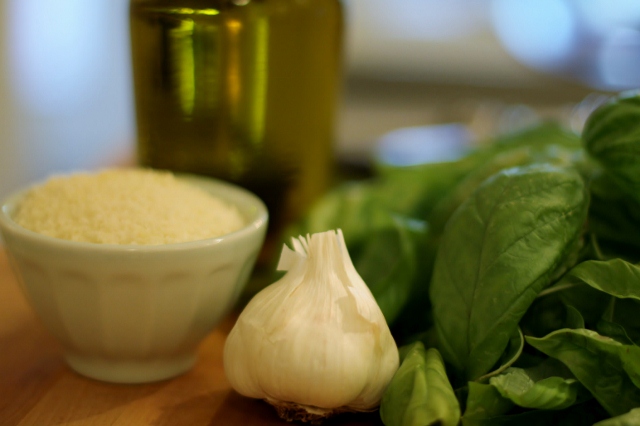
Pesto is such an easy thing to make and there are so many ways to make it. I like to keep it simple and use just six ingredients; basil, Parmesan Cheese, olive oil, salt, pepper and garlic. I have a child with a tree nut and peanut allergy so I do not use pine nuts in my pesto. The taste is delicious without them and it actually keeps the cost down because pine nuts are expensive.

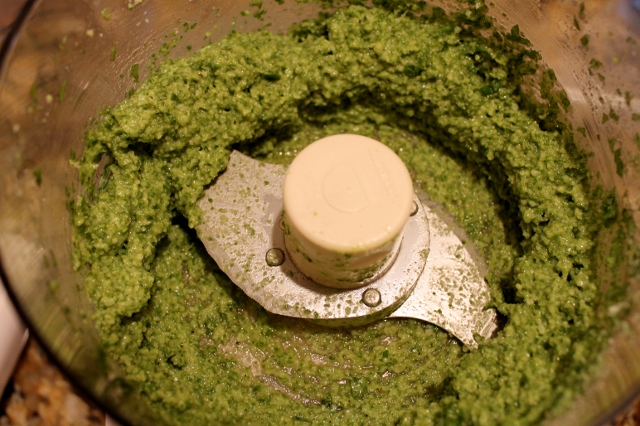
I toss everything but the olive oil into my food processor to combine it. Then I slowly add the olive oil until all of the ingredients are incorporated and the pesto is thick and somewhat smooth, sort of like a course ground mustard consistency.

I like to freeze my pesto so that we can enjoy it long after the basil plants are gone. I use a  1 1/4" cookie scoop to place large tablespoon sized balls of pesto onto a baking sheet lined with wax paper. You can use an ice cube tray to make individual cubes of pesto too but this way there is one less thing to wash!

I pop the tray into the freezer until the pesto is firm enough to pick up, about 20 minutes. 

I peel the pesto off of the baking sheet, place it in a Ziploc bag and store it in the freezer. Now whenever I want to add a little flavor to my recipes I can just reach in and grab as much as I need.

I love making pesto because it tastes good and it’s easy to do but there is a little part of me that enjoys feeling like I just saved a little bit of summer too.

Enjoy!

Leslie xo

Nut Free Basil Pesto

Author: Leslie Reese
Ingredients
  • 4 cups packed basil leaves
  • 2 large garlic cloves
  • 1 cup freshly grated Parmesan cheese
  • A few grinds of fresh ground black pepper (approximately 1/2 tsp)
  • A few pinches of salt (1/2 to 3/4 tsp)
  • About 1 cup extra-virgin olive oil
Instructions
  1. In a blender or food processor pulse basil, garlic, cheese, salt and pepper to combine.
  2. Slowly add olive oil with food processor running until mixture forms a smooth and thick consistency.
  3. Scoop or spoon very full tablespoon sized amounts of pesto onto a tray lined with wax paper.
  4. Set tray in freezer until pesto is firm enough to pull off of wax paper.
  5. Place pesto scoops in a Ziploc bag or plastic container and store in freezer.

Favorite Things

Life rushes by at such a fast pace and when we get busy with all that we have going on, we often forget to stop and pay attention to the little things. There are so many small joys that happen every day. Something as simple as a morning sky, a blooming flower or a person walking by can turn into one of life's best moments, if you take time to notice it. Here are a few of my favorite moments from the week. Happy Friday!

Waking up to a gorgeous sunrise during a weekend trip to the beach.

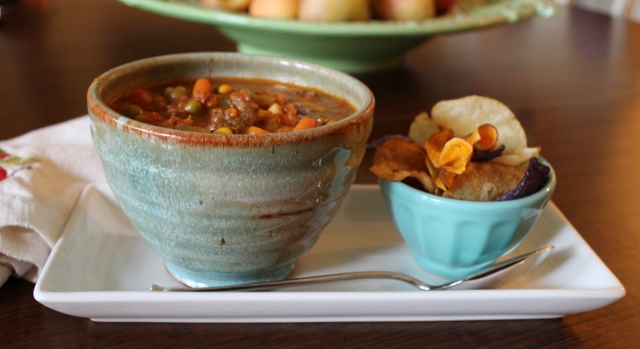
My mother's homemade vegetable soup with a side of gourmet potato chips.

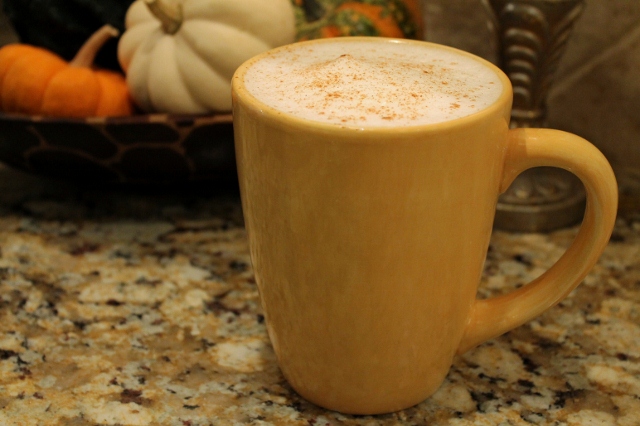
An accidental mix of hazelnut and pumpkin spice coffee that ended up being one of the best tasting lattes ever.

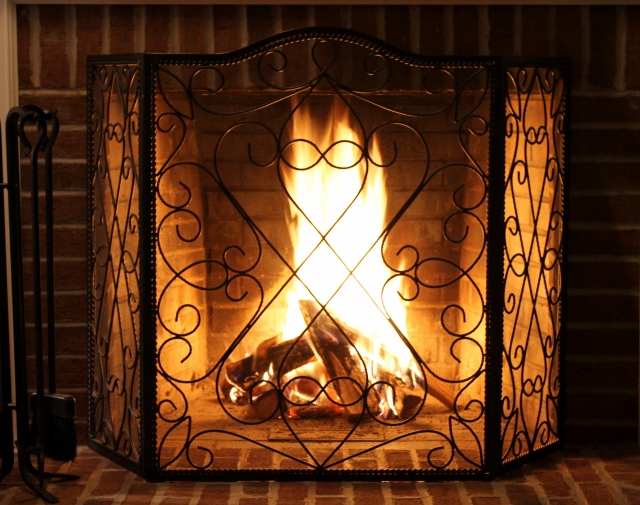
Our first fire of the season.

Watching my grandson create a masterpiece with his own little hands.

Don't forget to look for the little things! Have a wonderful weekend!

Leslie xo

Williamsburg Orange Cake

When it comes to cooking and baking, we all head to the internet to search for great recipes. Some days, I literally have my computer on my kitchen counter so I can read a recipe while I’m baking. I have some great cookbooks and I love to use them, but they are not always the first place I go for a new recipe. So in a world where Food Network and Pinterest are the source for so many of our recipes, I thought it might be fun to bake a cake the old fashioned way, with a cookbook.

This Betty Crocker’s Cookbook that I found deep in my cabinet is the first cookbook I ever owned. Originally published in 1978, this book was the New and Revised Edition that was printed in 1981.  I loved flipping through it and was amazed at how much things have changed in 30 years. The photos  are vintage and the recipes, classic.

I decided to make a Williamsburg Orange Cake. I baked this cake years ago for a bridal shower I was hosting. It's a moist, delicious cake that is similar to carrot cake but has a light orange flavor. It's a perfect fall dessert and something you don't see often, which is why I like it.

Orange zest is the key ingredient in this recipe. Just a tablespoon gives the cake a wonderful, fresh flavor.

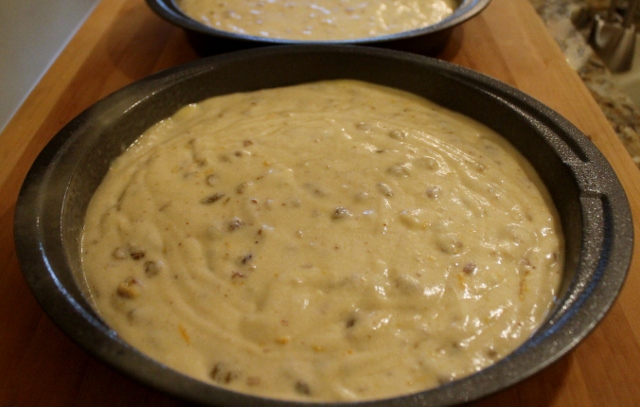
I was in the mood to make a layer cake so I used two 9" cake pans. My layers were not very tall. You could easily use three 8" cake pans for a taller stacked cake or a 13 x 9 pan if you want something that is quick to frost and easy to transport.

The Williamsburg Frosting is a perfect topping for this cake. It's light and full of flavor with both orange juice and orange zest mixed in.

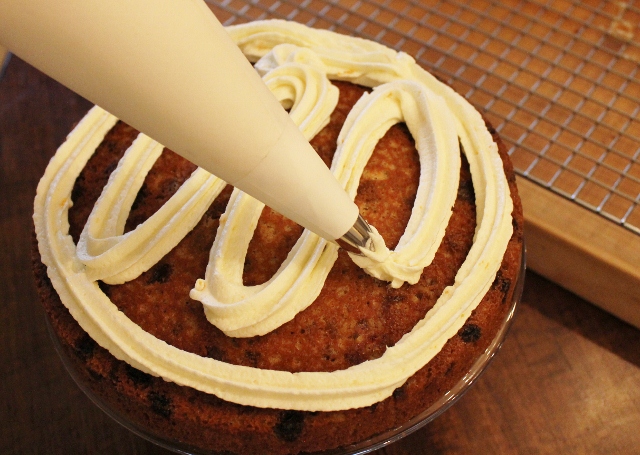
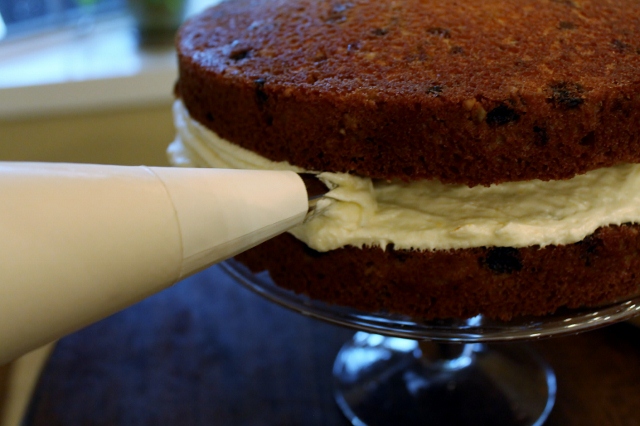
I like to put my frosting in a decorating bag so I can control where it goes a little easier. 

I put a small dot of frosting on top of my cake stand to keep the layers from sliding.

I alternate between the decorating bag and a spreader to frost the entire cake.

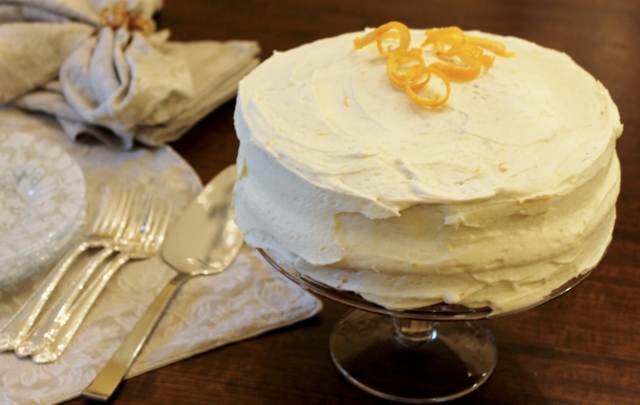
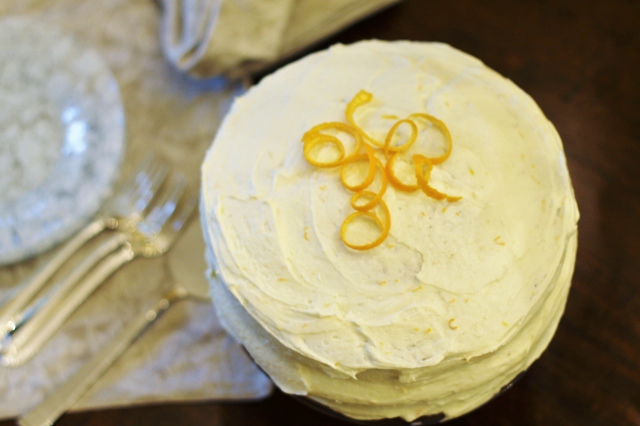
A quick frost all over and a few orange curls on top to finish the cake.

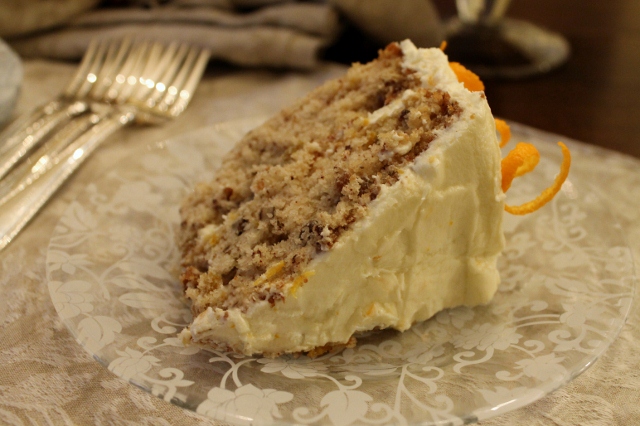
Amazing texture and flavor. Apparently some things never change...even 30 years later!

Enjoy!

Leslie xo

Williamsburg Orange Cake

Author: Leslie Reese
Adapted from the Betty Crocker's Cookbook (1981)
Ingredients
  • Cake
  • 2 1/2 cups all-purpose flour
  • 1 1/2 cups sugar
  • 1 1/2 teaspoons baking soda
  • 3/4 teaspoon salt
  • 1 1/2 cups buttermilk
  • 3/4 cup butter
  • 3 large eggs
  • 1 1/2 teaspoons vanilla
  • 1 cup golden raisins, cut up
  • 1/2 cup finely chopped nuts - I used pecans but you can use your favorite nuts
  • 1 tablespoon grated orange peel
  • Williamsburg Frosting
  • 1/2 cup butter, softened
  • 4 1/2 cups Confectioner's sugar
  • 4 tablespoons orange juice
  • 1 tablespoon grated orange peel
Instructions
Cake
  1. Preheat oven to 350 degrees.
  2. Grease and flour a 13 x 9 pan or two 9 inch round cake pans.
  3. Beat butter, sugar and eggs until blended.
  4. Add buttermilk and vanilla. Mix until blended.
  5. Sift together flour, salt and baking soda. Add to sugar mixture and blend on low speed for 30 seconds. Beat on high speed 3 minutes, scraping bowl occasionally.
  6. Add raisins, nuts and orange peel and mix until combined.
  7. Pour into pans.
  8. Bake until wooden pick comes out clean, 13 x 9 pan - 40-45 minutes, layers - 30-35 minutes.
  9. Cool then frost with Williamsburg Frosting.
Frosting
  1. Whip butter and powdered sugar together until fluffy.
  2. Add orange peel and slowly add orange juice until frosting reaches desired consistency.
  3. Refrigerate frosted cake.

Favorite Things

Pink ranunculus from a trip to The Flower Fields at Carlsbad Ranch in California.

October is National Breast Cancer Awareness Month. Somehow we are all affected by this disease. Maybe we have been diagnosed or a family member, friend or someone we know has been diagnosed. Take time this month to become more aware. Help someone fight. Support someone in need. Encourage someone. But most of all, pay attention to the little things in life  and celebrate the good. Let's all "Get Our Pink On" in honor of women everywhere. Here are some of my favorite pink things. Happy Friday!

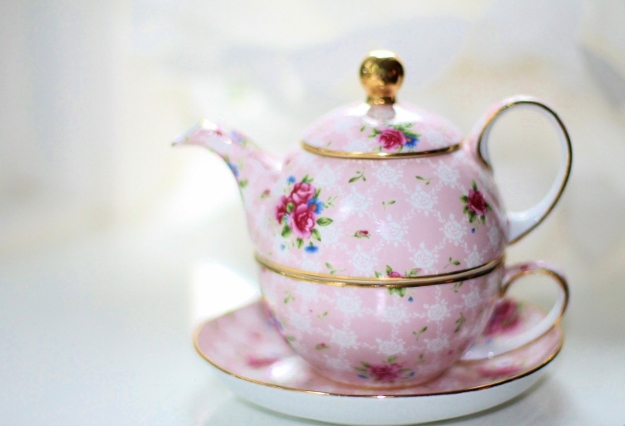
A pretty pink tea set from my grandmother. Something I treasure.

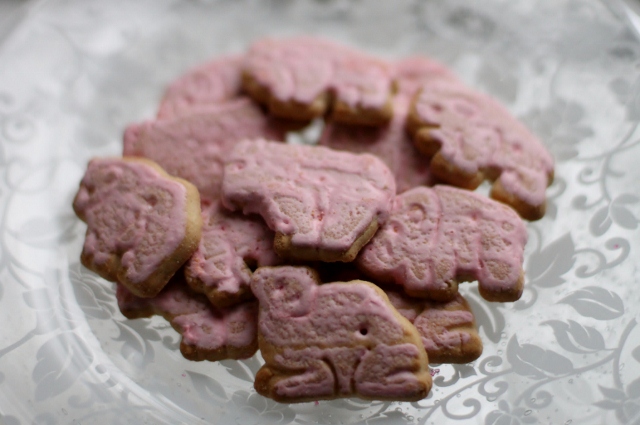
Pink iced animal cookies.

Pink decorating sugar.

Sugar cookies with pink icing.

Pink peonies.

 Breast Cancer Awareness bracelets from Pura Vida &  Rose Quartz bracelet that I designed.

Essie nail polish in Good Morning Hope, debuting this month to support National Breast Cancer Awareness.

Have a wonderful weekend!

Leslie xo

Photos by Leslie Reese


Homemade Pasta

Every once in a while I get the urge to make homemade pasta. And then as soon as I make it, I ask myself why I don't do it more often. There is something wonderful about homemade pasta. It's delicious and worth the extra effort it takes to make it. Especially when you have the kitchen tools to do it, which I do. So, this week I decided it was time to make homemade pasta.

A long time ago, my Italian grandmother made pasta the old-fashioned way, with a rolling pin and knife. She would go down to the kitchen in her basement to make it. I remember watching her make a well of flour on her marble table. She would add some eggs and a tiny bit of water. I like to make my dough the way she did. I used about 3 1/2 cups of flour, 4 large eggs, a few tablespoons of water and a pinch of salt. 

I mixed it by hand.

Until it came together and formed a ball.

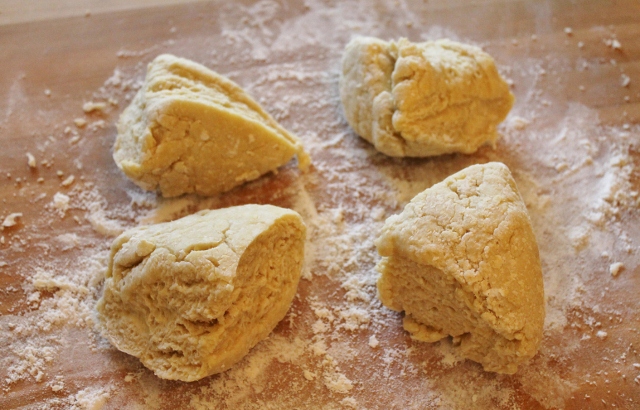
Once the dough was pretty well mixed I divided it into four parts.

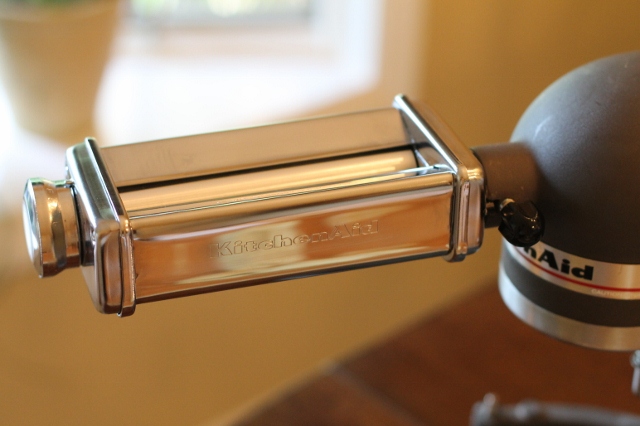
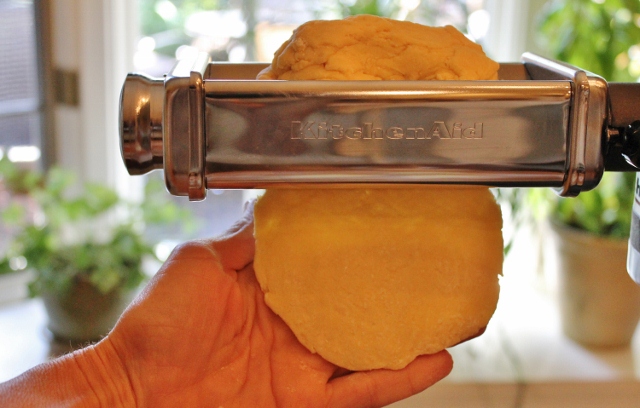
Next, I got out the Pasta Roller & Cutter Set that attaches to my Kitchen Aid mixer. My kids gave it to me for my birthday a few years ago and I love it. It's so much fun to use, and definitely one of the coolest kitchen appliances I have.

I attached the pasta roller first. It fits onto the front of the mixer and it will spin automatically when the mixer is turned on.

The dough goes into the top of the roller and is kneaded and thinned out as it is pushed through the other end. When you use the Kitchen Aid and the attachments, you don't have to knead the dough quite as much by hand. The roller does it for you.

I put the dough through a couple of times until it was smooth.

I adjusted the rollers to make the dough a little thinner.

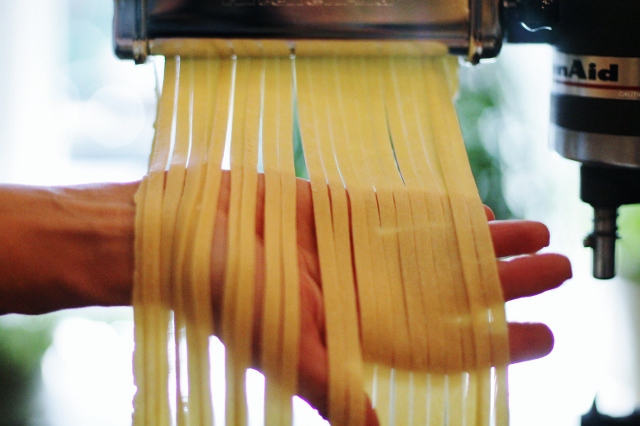
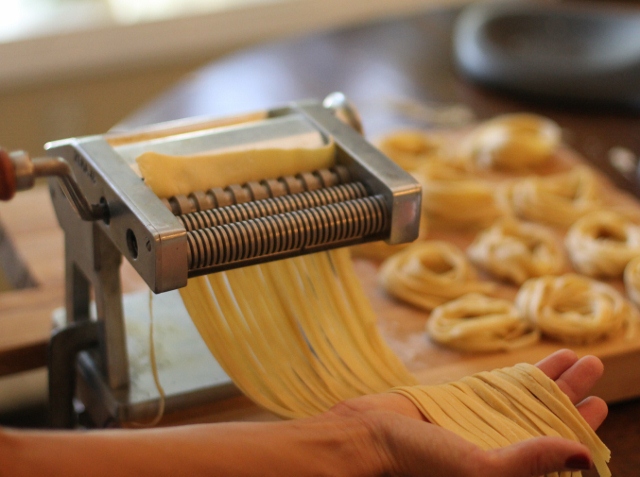
I decided to make fettuccine, so once the dough was as thin as I wanted it, I attached the fettuccine cutter to the mixer and ran sheets of pasta through it one time.

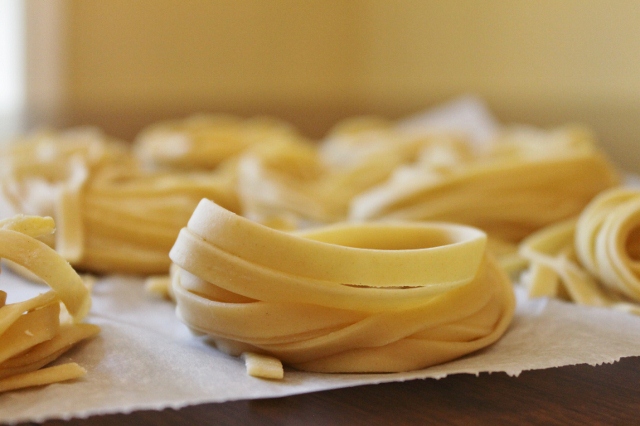
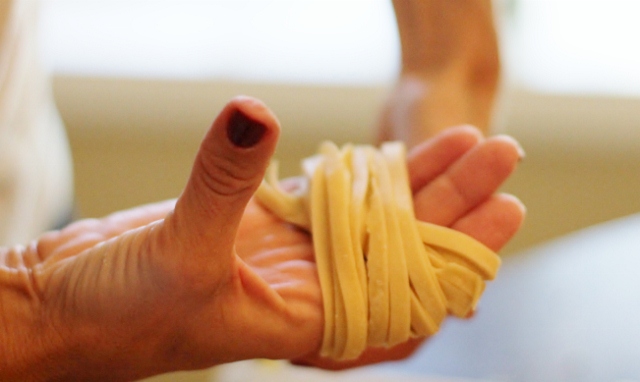
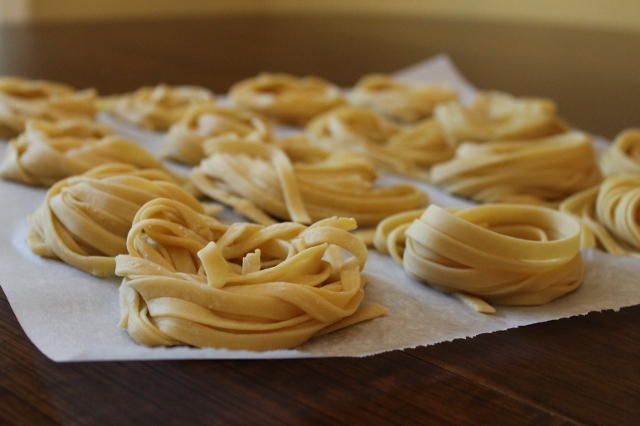
I rolled the fettuccine into little nests and set them on parchment paper to dry. Any really long strands were cut in half first.

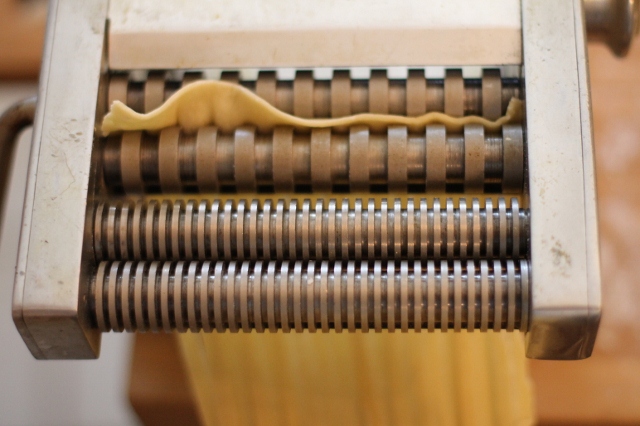
Then I did something different with the rest of the dough. I told you how my grandma made pasta by hand a long time ago. Well at some point she started using a manual, or hand crank, machine. I was fortunate enough to inherit that machine before she passed away and I will treasure it forever. I decided to get that machine out of the box and make the rest of the fettuccine with it. It was very nostalgic.

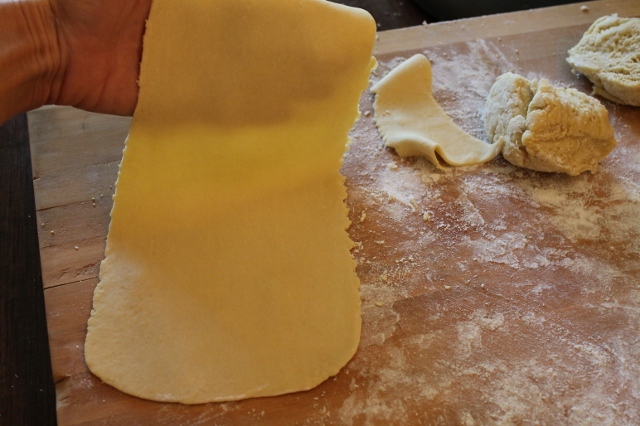
My grandma had a long wooden rolling pin and she would roll her dough until it was as thin as she wanted it. Then she cut the dough into sheets to put through the manual machine. I used sheets of dough that were already thinned out from the pasta roller on my mixer.

The manual machine has different sized cutters for making fettuccine or spaghetti.

The fettuccine turned out perfect. It might have been even better than the pasta made from the automatic machine. I'm sure it had something to do with the fact that my grandma's pasta machine holds a lot of memories and wonderful stories. She would probably be smiling right now, knowing that even though I had a way to make it easier, I was still happiest making pasta the way she did, and with her machine.

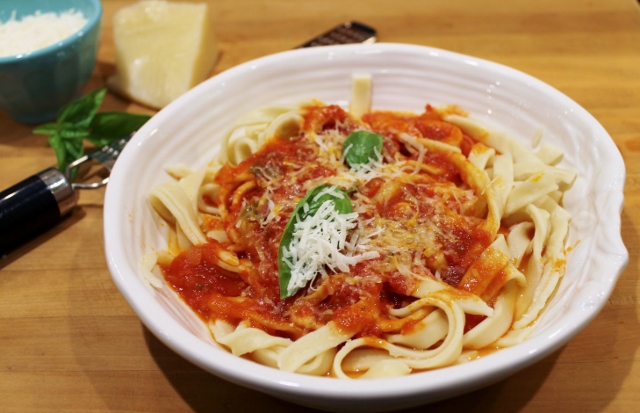
We had fettuccine for dinner that night. I boiled the pasta until it was al dente and topped it with homemade marinara sauce and grated cheese. It was delicious. I am going to try not to wait so long until I make homemade pasta again. Maybe next time I'll try ravioli...

Mangia, Mangia!

Leslie xo

Photos by Leslie Reese and Lynsie Reese

Favorite Things

Football season is in full swing and heading out for a big game is always fun. The tailgating, the energy; what’s not to love? But sometimes those Saturday afternoon seats on the couch can get a little boring. It’s just not the same as watching the home team take the field while you’re jumping on the bleachers at a college game. For me, grabbing a few of my favorite things for “home” games helps make football season a lot more fun. Happy Friday!

I still love flipping through magazines. I don't think it will ever get old.

A perfect time for updating my manicure to a fun, fall color.

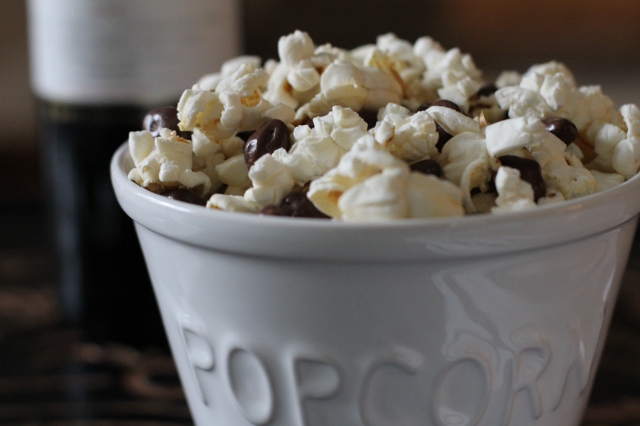
Popcorn & Raisinets {my twin sister's invention} a perfect football snack.

Wine isn't just for tailgating...

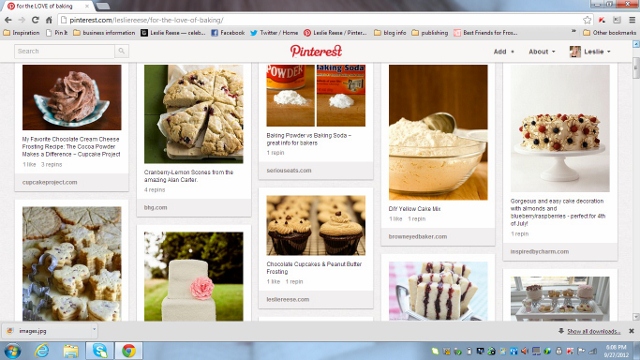
Pinterest. In case of overtime...

Have a wonderful weekend!

Leslie xo

Photos by Leslie Reese

Simple Dessert Bar

This past weekend I had the opportunity to help my daughter, Elizabeth, host a bridal shower in our home for her best friend, Brittany. It was an intimate party with a simple but elegant theme. We decided to make use of the space we had and created a dessert bar right on the window sill in our dining room. The result was a pretty display that was easy to put together, out of the way and fun for the guests. We made it completely self-serve and included a selection of miniature desserts so that we could offer a nice variety without going overboard since this was a small party.

The decorations were simple as well. Elizabeth made three large flowers out of white tissue paper and we placed them on top of apothecary jars that had the lids removed. Very inexpensive! The desserts were placed on two of the dessert stands that we made ourselves and a glass cake plate. Napkins, plates and a serving spatula were placed around the stands. The guests loved the display and were able to mingle with their dessert and coffee in a relaxed atmosphere. I love how something so simple can feel so elegant.

These Apple Pie Bites were adapted from a recipe that Elizabeth found on Pinterest. Not only were they adorable, they were delicious! Perfect for a dessert bar!

Brownie Pops. Probably the easiest dessert you could ever make! Elizabeth and Brittany share a love for Ghirardelli brownies so it was only fitting that they were part of this display. We stepped them up a notch by cutting them into petite squares and adding a stick! 

These Cheesecake Pops were a hit and quite literally addictive! Made with a frozen cheesecake from Costco and dipped into melted chocolate, they couldn't have been easier to put together. 

Celebrating should be fun, not complicated! Here are the recipes we chose for our Simple Dessert Bar.

Enjoy!

Leslie xo

Apple Pie Bites

Recipe Type: dessert
Author: Leslie Reese
Ingredients
  • Apple Pies
  • 1/2 cup sugar
  • 2 teaspoons cinnamon
  • 1 package refrigerated pie crust
  • 3 tablespoons melted butter, divided
  • 2 medium tart apples cut into wedges
  • Glaze
  • 1- 1 lb box of Confectioner's sugar
  • 1/3 cup butter softened
  • 1/4 cup milk
  • 1 teaspoon vanilla
Instructions
Apple Bites
  1. Preheat oven to 425 degrees.
  2. Combine sugar and cinnamon in a small bowl. Set aside 1 tablespoon.
  3. Unroll pie crust onto floured surface and brush with 2 tablespoons of melted butter. Sprinkle with remaining cinnamon sugar.
  4. Cut pie crust into 1 inch strips. Wrap one strip around one apple slice with the sugared side in. Continue with remaining dough and apples.
  5. Brush dough with melted butter and sprinkle with cinnamon sugar.
  6. Place apples on parchment lined baking sheet and bake for 15 minutes or until pastry is golden brown.
  7. Serve warm topped with glaze.
Glaze
  1. Combine butter, milk and vanilla in a bowl. Slowly add Confectioner's sugar until all ingredients are well incorporated.
  2. Place glaze in a pastry bag fitted with a round decorating tip and pipe onto baked apples. You can also put your glaze in a plastic bag and cut the corner to pipe your icing.
Brownie Bites

Recipe Type: dessert
Author: Leslie Reese
Ingredients
  • 1 box Ghirardelli Brownie mix
  • Ingredients listed on box
  • White lollipop or cake pop sticks
Instructions
  1. Bake brownies according to package directions using a square 8x8 or 9x9 pan.
  2. Set aside to cool.
  3. Once brownies are cool, cut into small 1 1/2 " squares.
  4. Place a stick into each brownie, pressing sides in slightly to hold if necessary.
Notes

What's nice about this recipe is that you can make as many cheesecake pops as you need. Servings will vary depending on the size of the cheesecake you start with and what size you make your pops.

Cheesecake Pops

Recipe Type: dessert
Author: Leslie Reese
Ingredients
  • 1 frozen cheesecake
  • 2-3 containers of Baker's Dipping Chocolate (milk chocolate, heat & dip)
  • White lollipop or cake pop sticks
Instructions
  1. Remove cheesecake from freezer and let it sit for a few minutes until it is soft enough to work with but not completely thawed.
  2. Using a small cookie scoop, scoop cheesecake and roll into balls. Place on a parchment lined cookie sheet.
  3. Insert a stick into each cheesecake ball. Place tray in freezer for at least an hour or until firm.
  4. When you are ready to dip the cheesecake, melt chocolate according to package directions.
  5. One at a time, dip balls into chocolate, tapping gently to remove excess and place back on cookie sheet.
  6. Place pops in refrigerator until ready to serve.

Photos by Leslie Reese


Favorite Things

I love all four seasons and the things that they represent. To me each one is a reminder that it's time to set new goals, enjoy new things and change up the routine. Fall officially starts tomorrow and as we say goodbye to heat waves, toes in the sand and warm summer nights, there are some wonderful things to look forward to. These are a few of the things I'm looking forward to right now. Happy Friday! 

Going to an Apple Orchard to pick our own apples.

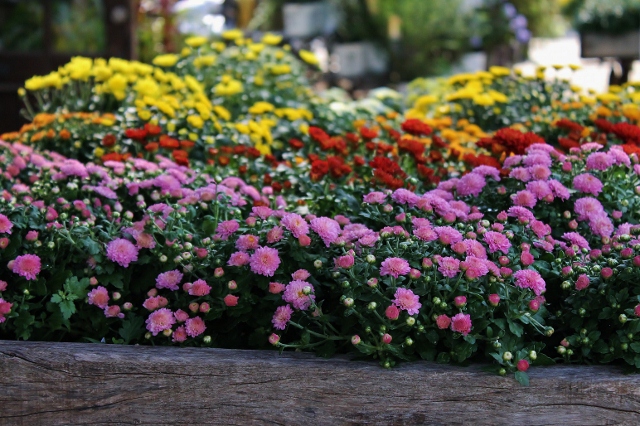
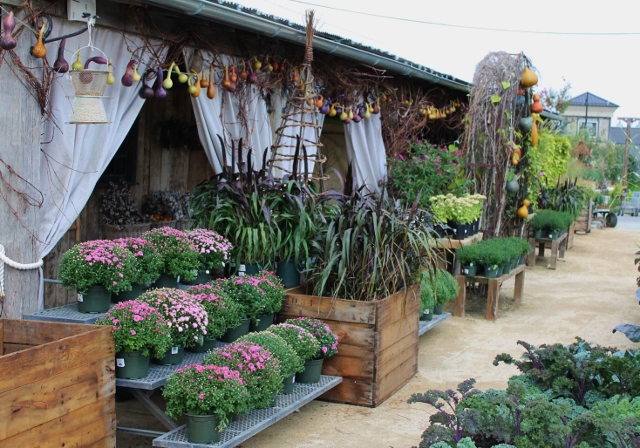
Fall Mums in a variety of colors.

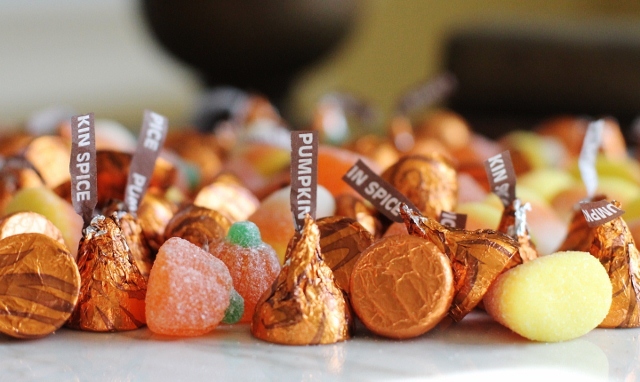
Fall themed candy for my candy jar.

Soft sweaters and scarves for crisp mornings and cool nights.

Burning Wood Wick Fireside candles. There's something about the crackling wick that makes the room feel cozy.

 Have a wonderful weekend!

Leslie xo

DIY Dessert Stand

I've always been a creative person and I love trying new things. Last year I needed a holiday gift idea for my girlfriends and when I couldn't find what I was looking for, I thought it might be fun to make them something. I hadn't done that in a while and I was in the mood to get "crafty" so I figured it was time for a DIY project. I decided to make dessert stands so, naturally, I went to Pinterest for some ideas. There were so many different styles and techniques. People were using everything from glass and glue to wood and paint. After researching different options, I came up with a way that worked for me. My result was an inexpensive and durable, not to mention pretty, dessert stand that was easy to make and fun to use. This is how I did it.

You will need to gather some supplies:

  • plastic plate  ~ I bought the plate for this stand at Target. It is a 12" square. You can use any size you like.
  • wooden candle holder ~  I used a 6" candle holder from Pier 1 for this stand. I have also used 12" candle holders for taller stands.
  • glass cabinet knob ~ You will need a standard cabinet knob (not a drawer pull). I found them at Home Depot.
  • hanger screw ~ I used a 2" hanger screw for this stand. A hanger screw is threaded on both ends (also at Home Depot).

You will also need some tools:

  • drill & drill bits ~ You will need one drill bit that is slightly thinner than the hanger screw (about 1/2 the diameter) This one will start the hole for the hanger screw to go into the candle stick. You will also need a drill bit that is slightly larger than the hanger screw. This one will make the hole in the plate.
  • pliers
  • pencil
  • measuring tape or ruler


Step 1: Working on the top side, measure and then mark the center of the candle holder with pencil.

Step 2: Carefully drill a hole straight down into the candle holder where you put the pencil mark. Hold the bottom, not the top of the candle holder with your other hand. You are just drilling a starter hole which only needs to be about 1/4 of the total length of the hanger screw.

Step 3: Using the pliers, screw the hanger screw (the side with the large threads) straight into the hole you just made. Carefully hold onto the center of the screw with the pliers while you are turning it so you don't damage the threads.

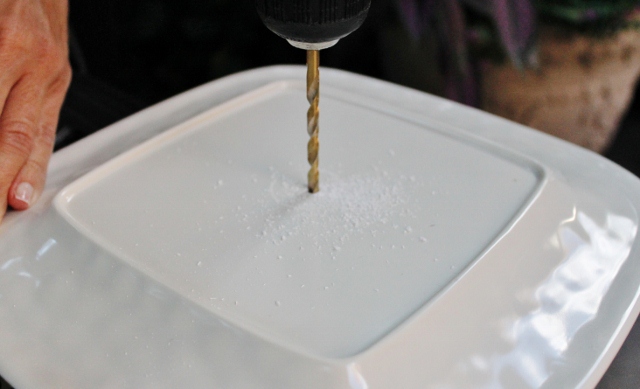
Step 4: Turn your plate over. Measure and then mark the center of the plate with a pencil.  Keeping the plate turned over, place it on the end of a table or workbench. I highly recommend a work bench or outdoor table and not a kitchen counter or table! Holding onto one end of the plate and making SURE the middle is NOT on the table, carefully drill a hole through the center of the plate.

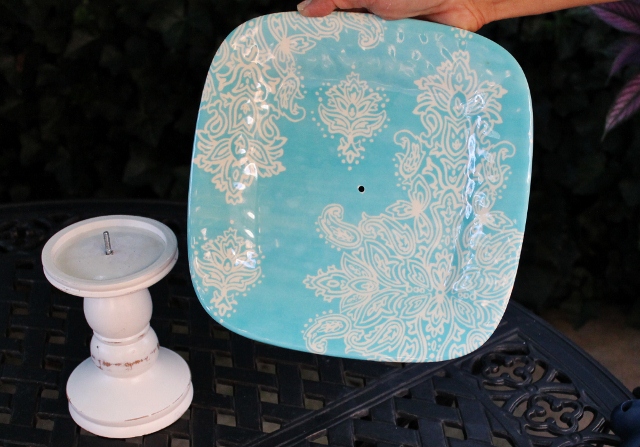
If you drilled properly, you now have two pieces of a dessert stand that need to be put together. If you didn't, just try again and be glad the plates were cheap!

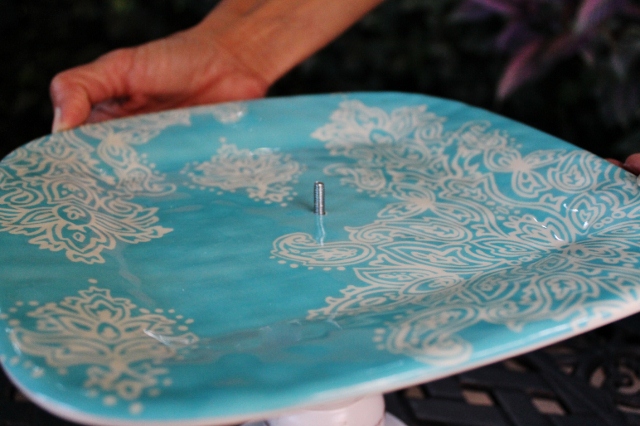
Step 5: Place your plate over the screw on top of the candle holder.

Step 6: Twist your cabinet knob onto the screw and tighten until everything is secure.

You now have a pretty little dessert stand that can be used for serving cookies, candy or even simple hors d'oeuvres!

It's that easy! There are so many options when you start mixing color and style. I like looking for different shapes and sizes of plates and candle holders. Since I gave my dessert stands as gifts, I wrapped them with things like dessert napkins and decorating sprinkles. It would even be fun to add recipes or a favorite batch of cookies!

Have fun!

Leslie xo

*TIP* Do not submerge your dessert stand in water. Wipe clean with a damp cloth and dry. Although you can disassemble the dessert stand, I don't recommend doing it often because the screw may become stripped after repeated knob removal. While I personally love the idea of switching out the plates, I don't think the stand would last as long if I did that.

Photos by Leslie Reese


Favorite Things

I saw a quote the other day that I liked. It said "Be your own kind of beautiful". I truly believe that feeling beautiful starts on the inside, with the person you are.  If you feel beautiful, you will look beautiful. And sometimes something as simple as playing with color or wearing the perfect accessory can make you feel beautiful too. Here are a few of my favorites right now. Happy Friday!

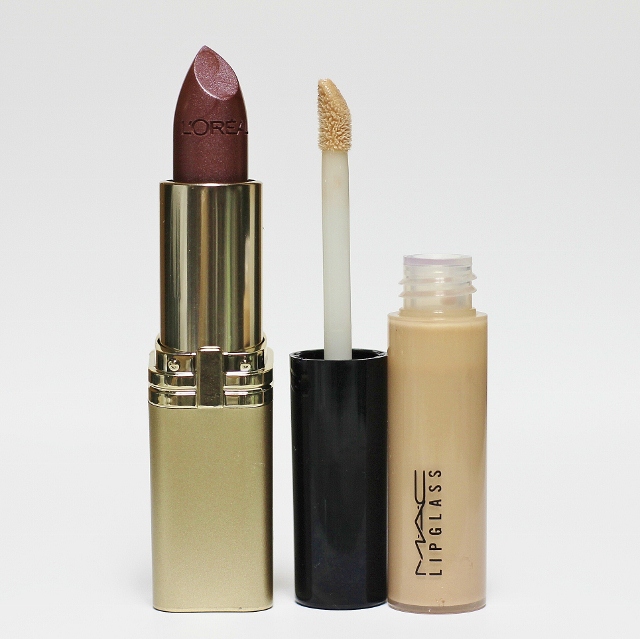
L'Oreal lipstick in Mica topped with MAC Lip Glass in C-Thru. Grocery store meets makeup counter. Perfect combo!

Layered Nail Polish. OPI ~ Sweet Heart topped with Honeymoon Sweet. A pretty combination with just a touch of pink.

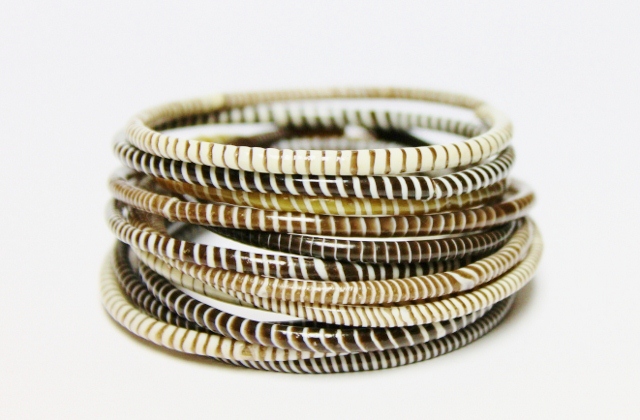
Stacking bracelets made from recycled plastic. I picked these up at the Hell's Kitchen Flea Marketin NYC for $1 per bracelet!

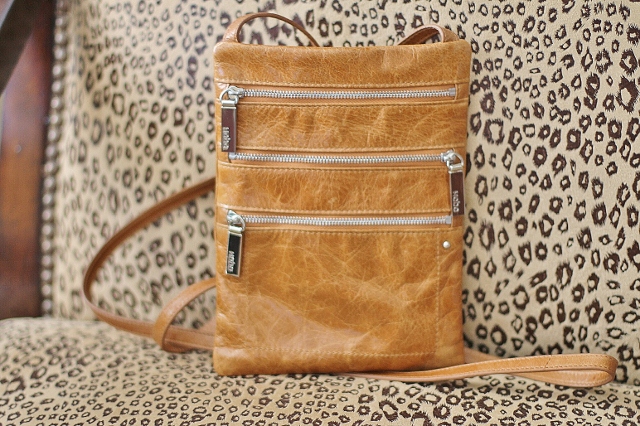
Leather cross body handbag by Hobo. My favorite bag for city travel.


Have a great weekend, and always feel beautiful!

Leslie xo


Photos by Leslie Reese

A Trip to Terrain at Styer's

I love finding unique places to dine and shop. I live in a town that is close to some great cities like New York, Philadelphia and DC so it's easy to find something interesting no matter which direction you go. Last week my daughter and I decided it was time to hit the road and find a new place to explore so we grabbed my mom, who is as adventurous as we are, and jumped in the car. We headed toward Philadelphia this time and ended up in Glen Mills, PA. And oh what a wonderful place we found! The store is called Terrain and it is the most amazing home and garden store I have ever been to! There is a fantastic outdoor market, a wonderful indoor shopping area and a fabulous Cafe. Two of my girlfriends have been raving about this place and they were right! It really is unique, so unique I thought I would share my day with you so if you are ever in the area you can make a point to stop there. You will not regret it!

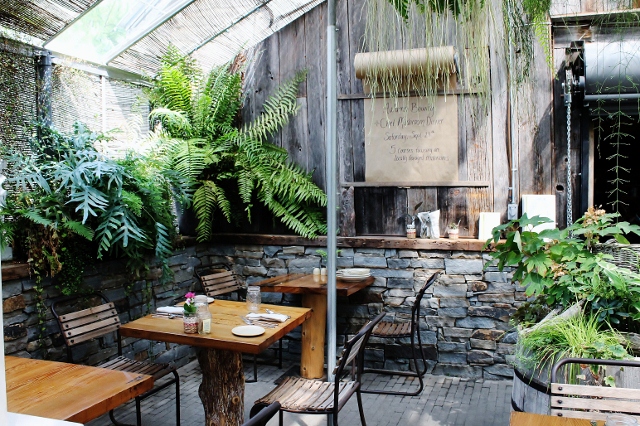
We had lunch at the Garden Cafe. Beautiful plants, stone walls and a rustic setting all contribute to the natural and comfortable atmosphere that makes you feel like you are dining outside.

The drinks were served in mason jars and fresh baked bread was delivered to the table in a small clay pot. It's little details like these that create a wow factor. I love that.

The lunch menu is amazing. I ordered Seared Maine Scallops with quinoa and barley salad, grilled corn, heirloom cherry tomatoes, toasted pine nuts and garden herbs. It was delicious.

After lunch we started our journey around the store. It's a challenge to find the right words to describe it but I'll try. Did I already say amazing? There is an abundant supply of all things green. A plant lover's paradise.

I like plants but I was happier exploring the home products. This store has everything from specialty soaps and leather handbags to flower bulbs and fountains . These were a few of my favorites...

Bath Products. Love the packaging.

Specialty Soaps. Beautifully wrapped. 

 Sponges. Creatively labeled.

Matches in an Apothecary bottle. Just plain cool.

Pink Himalayan Salt. So pretty, you have to have it.

DIY Terrariums. I'm thinking perfect gift idea.

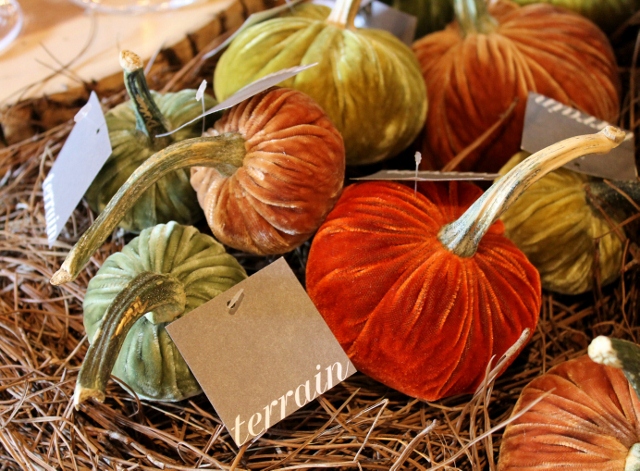
Real, but not so real, fabric pumpkins. A clever and unique fall decorating idea.

Natural Cotton Stems. One of those things you don't realize you want until you see it.

If you can make it through the store by the time it closes (trust me you won't want to leave) there is an unbelievable outdoor market waiting to be explored. Plants, pumpkins, outdoor decor and more. It really is a spectacular place to visit. I can only imagine what it will be like for Christmas. I guess I will have to go back to find out! If you go, have fun and don't blame me if you get hooked!

Leslie xo

Terrain has two locations. For more information click the links below:

TERRAIN

Glen Mills, PA  &  Westport,CT

Photos by Leslie Reese

Favorite Things

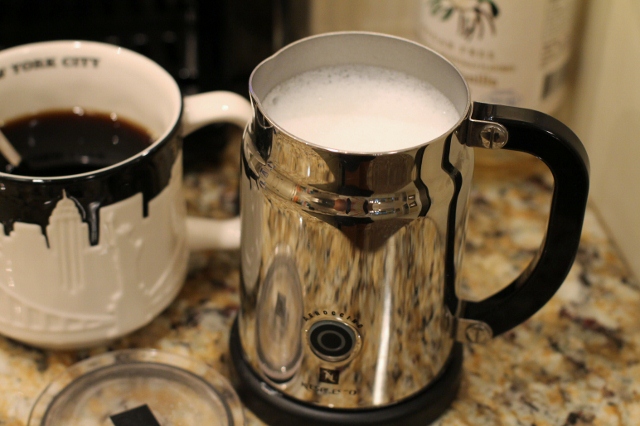
Four years ago, during a trip to Italy, I fell in love with coffee. I have been an avid tea drinker for most of my life but there was something about that Italian Espresso that had me trading in my tea leaves for coffee beans by the time I got home. My morning wake up call is now a homemade latte using a few of my favorite things. Happy Friday!

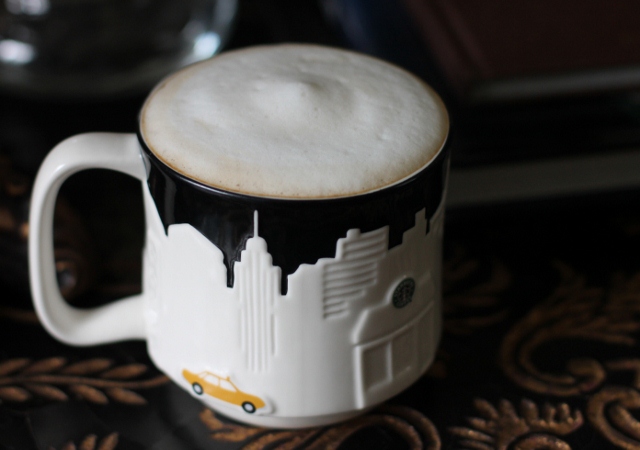
My favorite coffee mug from Starbucks. It reminds me of one my favorite places.

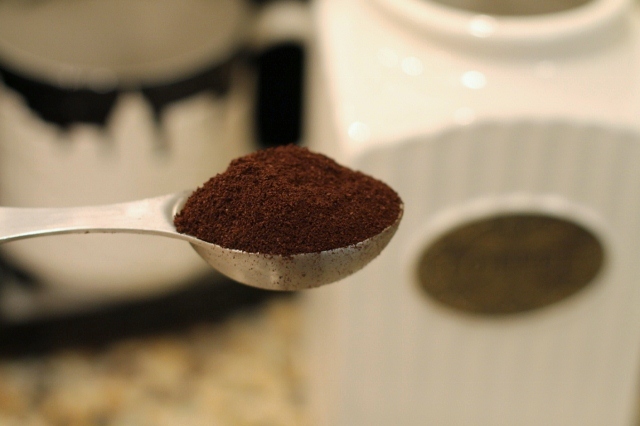
Espresso Coffee. Enough said.

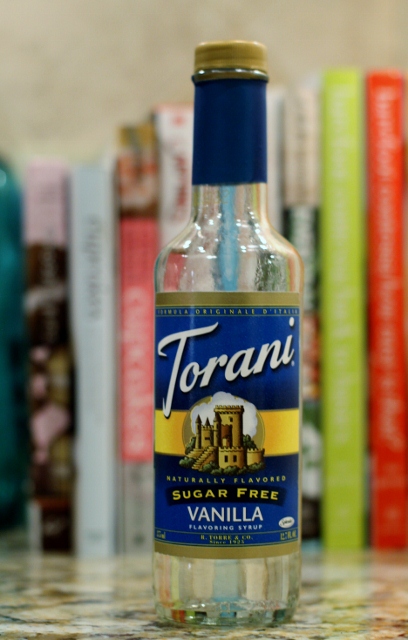
Torani Sugar Free Vanilla Syrup. I've tried them all. This is the best!

Nespresso Milk Frother. I am completely addicted to this wonderful little gadget. I will even take it with me when I travel!

Have a wonderful weekend!

Leslie xo


Photos by Leslie Reese

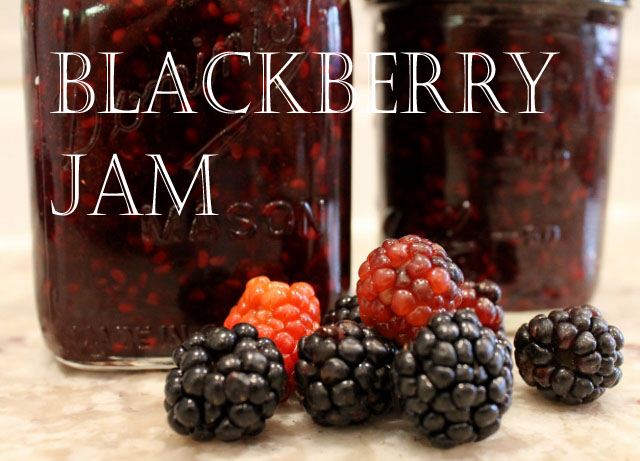
Dad's Blackberry Jam

I have an Italian father and he is a great cook. I have learned a lot from him over the years and I love cooking with him. He is usually busy making things like marinara sauce or chicken cutlets but lately he’s been whipping up things like peach pie and blackberry jam. During a recent visit to his house to make spaghetti sauce, he asked me if I wanted to make jam. His blackberry bush had some ripe berries on it. I had never made jam so I said yes. I figured it would take a while but I wanted to learn so I decided to stick around. What I learned was, my dad's version of blackberry jam had to be the quickest and easiest jam you could ever make. It took minutes, literally. I thought I would share this with you in case you thought making jam was involved and time consuming, like I did. It doesn't have to be. Just keep in mind, this is a simple recipe. My dad is a little unconventional, he wastes no time. This recipe does not involve canning or preserving. I just wanted to show you how quickly you can make a jar of jam when you have some fruit you need to use or you want something homemade. It's fun, it's easy and it tastes good!

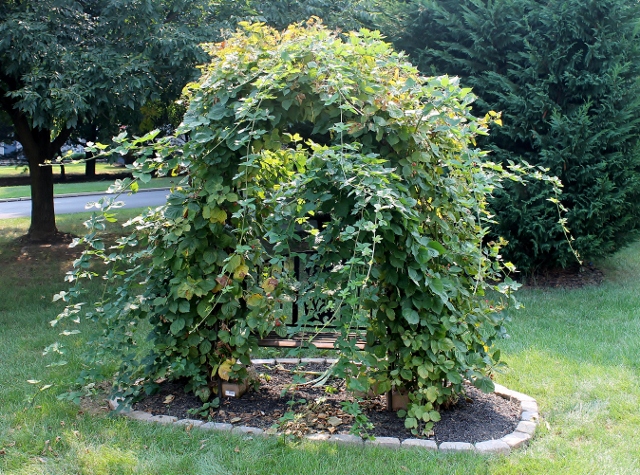
A small plant that my dad planted a few years ago has grown into a large bush. It yields the most wonderful tasting blackberries. They start out red and turn purple or "black" when they are ripe. If you eat them before they are ripe they taste sour. I actually like the sour ones...

We collected the ripe berries and put them in a pot. The pot we used is an old pot that was my grandma's. It was one of those "little things" that made the experience mean more.

We used a potato masher, another item from my grandma's kitchen, to break up the berries and then put them on the stove on low heat.

Once the berries were broken down we added a packet of pectin mixed with a small amount of sugar and brought the mixture to a boil over medium heat.

Once the mixture reached a full boil we added the rest of the sugar, stirring constantly.

We brought the mixture back to a full boil until it reached the desired consistency. It only took a couple minutes.

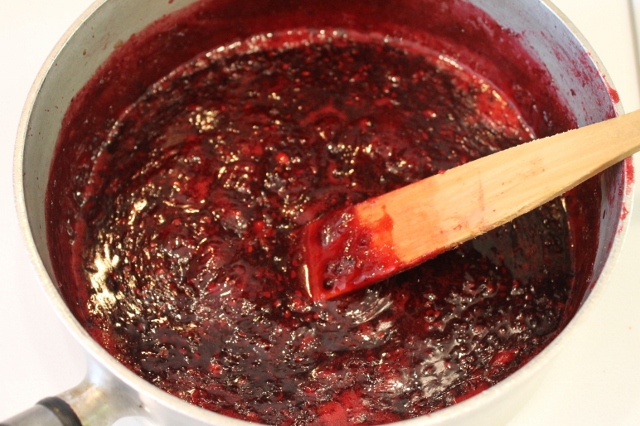
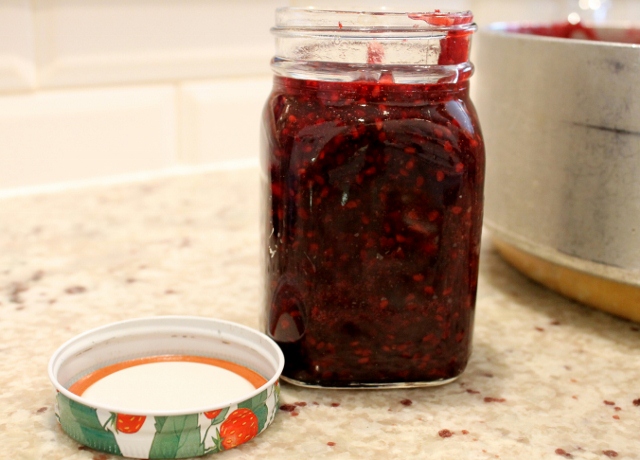
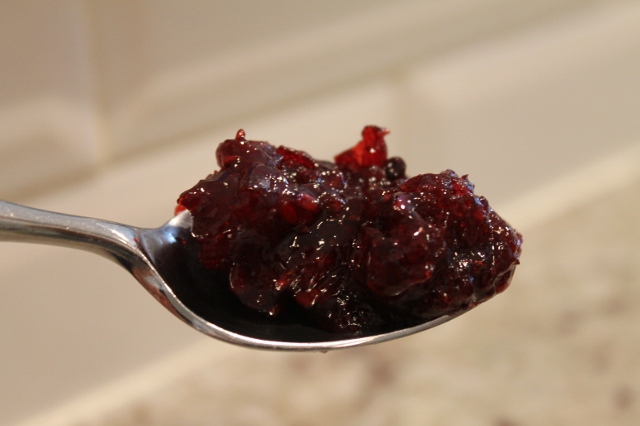
When the jam was finished it was glossy and thick. We poured it into jars that were sterilized in the dishwasher.

As you can see we had a beautiful, thick  jam in no time at all.

We were able to pick about 6 cups of ripe berries from the bush which yielded about 18 ounces of jam.

This jam was made to be enjoyed right away. It was stored in the refrigerator and will last a few weeks. Remember this was a make it quick, eat it now kind of thing. We did not seed the fruit, worry about foam or boil the jars. I will save that process for a day when I have more time and plan to get more creative with flavors. In fact I have a friend who recently made some amazing preserves out of cantaloupe and I am inspired. I love the idea of canning and having summer foods in the middle of winter but this day was all about a blackberry bush and a day with dad.

My favorite way to eat this blackberry jam is on a piece of toasted Marathon Energy Loaf from Wegman's. Simply delicious! 

Enjoy!

Leslie xo

Dad's Blackberry Jam
Author: Leslie Reese
Ingredients
  • 6 cups of fresh picked blackberries (remove any stems or leaves)
  • 1 packet of pectin(I used Sure-Jell) mixed with 1/4 cup sugar
  • 2 cups sugar
Instructions
  1. Crush berries to desired consistency in a medium pot and place over low to medium heat.
  2. While stirring constantly add the pectin mixed with 1/4 cup of sugar and bring mixture to a full boil.
  3. Add the remaining 2 cups of sugar and continue to stir as the mixture comes back to a full boil and then boil for about another minute.
  4. Remove from heat and check the thickness of the jam. If it's too thin you can add more pectin and return to a boil, otherwise let the pot sit for a couple of minutes.
  5. Spoon or pour jam into jars.
  6. Refrigerate jam and use within a few weeks, if it lasts that long!
Notes

*this jam is not preserved and needs to be refrigerated *this jam can be made with other types of fruit ~ We like strawberries, peaches and blackberries

Photos by Leslie Reese

Peach Berry Crisp


Fall is around the corner, kids are back in school and vacations are over for most of us. We all seem to be ready for a change at this time of year, especially with our menus, but there is plenty of summer left to enjoy! Not only is the weather still warm but summer fruit is still in season so why not make the most of it while we can. Soon enough it will be time for soup, apple pie and hot chocolate but for now while peaches and some berries are in full swing, I want to make what I can before they're gone. I have a recipe for fruit crisp that is quick and easy, not to mention delicious, so  I wanted to share it with you. It's a perfect dessert for your favorite back to school dinner and a time saver if you have a busy schedule!

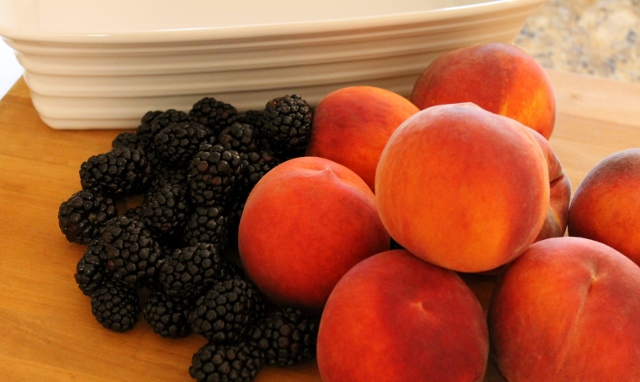
What's fun about this recipe is that you can customize it by simply changing the fruit or adding nuts or other ingredients to the crumb topping. I make this recipe with apples in the fall and it's wonderful. Today I am using peaches and some fresh picked blackberries. Use whatever fruit you like.

The secret to this recipe is in the crumb mixture. It contains a boxed cake mix. While I rarely use boxed mixes, I recently learned that they are perfect for making a fruit crisp. Last summer when I was visiting relatives in Texas, my cousin served a beautiful Berry Crisp for dessert. The topping was amazing. When I asked her what it was, she told me she used a boxed cake mix in her crumb mixture. She didn't have a recipe. So naturally I came home and tried it myself. I haven't gone back to a regular crumb recipe since.

This simple mixture of butter, oats, brown sugar, cinnamon and cake mix is the perfect combination for a great crumb topping. The texture is light and the flavor is delicious.

One box of cake mix will make enough crumb for a 13 X 9 pan but you can easily alter the amount according to your needs.

I would love to hear from you if you try this recipe. There are so many great possibilities! If you come up with something that's a hit with your family, let me know and share it here!

Enjoy!

Leslie xo

Peach Berry Crisp
Recipe Type: Dessert
Author: Leslie
Ingredients
  • 6-8 fresh peaches, sliced or cut into pieces without skin
  • 3 to 4 cups of fresh blackberries
  • fresh squeeze of lemon juice
  • Crumb Topping
  • 1 box white or yellow cake mix
  • 1/2 cup butter softened
  • 1/3 cup brown sugar
  • 1 cup oats
  • sprinkle of cinnamon
Instructions
  1. Preheat oven to 350 degrees.
  2. In a large bowl combine cake mix, brown sugar, butter, oats and cinnamon until crumbly. Set aside.
  3. Lightly toss peaches and blackberries with a squeeze of fresh lemon juice in a separate bowl.
  4. Place fruit in an oven proof dish or baking pan that has been lightly sprayed with non stick spray.
  5. Cover fruit with crumb mixture.
  6. Bake for 30-45 minutes or until fruit is heated through and crumbs are light brown and baked through.
  7. Let sit 15-20 minutes before serving.
Notes

*Best served warm and topped with vanilla ice cream *Can be made ahead of time and reheated before serving


Back to School Snack Pops

Summer is coming to an end and that can only mean one thing - school is back in session! We all know how bittersweet this time of year can be but instead of trying desperately to hang onto summer why not jump into fall and make a party out of it? After all, it’s all of the little things that add up to make great memories so why not kick off the school season with a celebration. I've got the perfect place for you to start!

As you may know, I am a contributor for a wonderful online dessert magazine, Best Friends For Frosting , where we aim to inform, excite and inspire you with all things dessert. Well, Best Friends for Frosting and Sprinkles & Grins, the online destination for Signature Brands, LLC., maker of dessert decorating products including Betty Crocker and Cake Mate frostings, icings, candles, sprinkles, and more, have officially teamed up on a back to school themed website promotion and contest – Back to School Bake-off. This awesome new website will feature recipe and party ideas contributed by an exclusive group of creative bloggers and professionals. I was thrilled to be asked to participate and I couldn't wait to get started! What’s really cool is that everyone can get involved! Not only will you find great ideas at Back to School Bake-off but there is an exciting recipe contest and you can win cool prize packs for participating! So head over to Back to School Bake-off and get your party started! I’ll see you there!

Back to School Snack Pops

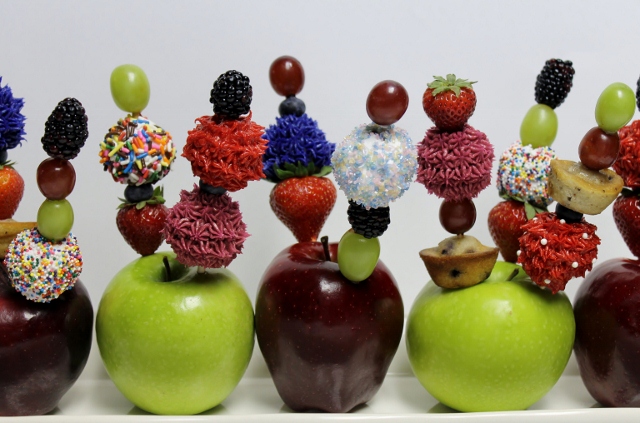
I love to bake but when my kids were heading back to school and things started getting hectic I was all for whipping up something "no bake". I created these fun Back to School Snack Pops for those of you who want something fun but easy. As far as I'm concerned, snacks don't have to be difficult to be amazing. Everything I used came from the grocery store. Sprinkles & Grins has some great products to make this easy!

Alternately slide small pieces of fruit, donut holes, mini muffins, etc. onto a 6" skewer. There are no rules. Use whatever you like. As long as it fits on the skewer, it works! And by all means if you want to bake, go right ahead, otherwise stick with prepackaged items.

Place a star tip onto a pouch of Decorating Icing. Cover your baked item with icing, sugar and/or sprinkles.  Be creative!

Once the pop is decorated, carefully push the skewer into the apple until it is secure. Place a small item such as a blueberry or grape on top of the skewer to finish the pop.  

Repeat the process placing 2 or 3 pops in each apple. Fill as many apples as you like. 

*Helpful Hint – Place skewers on top of apples and only slightly slanted. Placing skewers in the sides of the apples will cause the apples to topple over.

Head over to Back to School Bake-off to see my Back to School Snack Pops and other fun ideas!

Happy Fall!

Leslie xo

Back-to-School Snack Pops
Recipe Type: Dessert/Snack
Author: Leslie Reese
A fun and easy snack idea that is a great activity for parents and kids!
Ingredients
  • Assorted miniature baked goods – donut holes, cake pops, mini muffins
  • Assorted small fruit items – red and green grapes, blueberries, blackberries, strawberries
  • Cake Mate and Betty Crocker Decorating Icings in a variety of colors
  • Assorted decorating items – nonpareils, sugars, sprinkles
  • Wooden skewers
  • Apples for displaying Snack Pops
Instructions
  1. Place baked items and fruit in separate bowls to prepare for assembly.
  2. Arrange apples on a serving dish or platter.
  3. Working with one skewer at a time, begin alternately sliding fruit and baked goods onto the skewer. Leave about a 1 ½ to 2 inches at the bottom so the skewer can be pushed into the apple. You will also need to leave enough room on the top of the skewer so you can hold onto it.
  4. Place a star tip onto a pouch of Decorating Icing. Cover your baked item with icing, sugar and/or sprinkles. Be creative!
  5. Once the pop is decorated, carefully push the skewer into the apple until it is secure. Place a small item such as a blueberry or grape on top of the skewer to finish the pop.
  6. Repeat the process placing 2 or 3 pops in each apple. Fill as many apples as you like.
Notes

*Helpful Hint – Place skewers on top of apples and only slightly slanted. Placing skewers in the sides of the apples will cause the apples to topple over.


Sangria

During the summer months when the days are long, the weather is hot and people are getting together for outdoor parties and celebrations, Sangria is often on the menu. Sangria is a simple combination of wine, brandy, fresh fruit, and some sort of sweetener. To me, Sangria is a fun way to serve a glass of wine. It's something you can prepare ahead of time and since you serve it in a pitcher or a drink container, guests can easily help themselves. It's a great option if you don't want to be tending bar during a simple party. 

This summer has been very busy for us so Sangria was a great beverage to put on our Happy Hour menu, especially at the beach! I made three different versions this year; red, white and rose so there was something for everyone. The recipes are simple and can be altered in any way to suit your taste. I used fresh, seasonal fruit for the best flavor and I used inexpensive wine because this is one time when it won't matter! That's the beauty of Sangria! So use these recipes as a "guide" as you create your own version of Sangria for your next gathering. And remember, you can make Sangria all year. Just changing up the fruit gives you so many delicious options!

Cheers! xo
This recipe for Red Sangria uses 2 bottles of wine and is great for a larger serving vessel. If you just want enough for a smaller pitcher you can easily cut back on the wine and other ingredients.

Red Sangria

Recipe

Ingredients

1 orange sliced

1 apple sliced

1 lemon sliced

1 lime sliced

1 cup orange juice (fresh squeezed is best)

1 cup brandy

1 cup lemon club soda or seltzer

2 bottles red wine

Method

Pour brandy and orange juice over fruit in a large pitcher or serving container. Add wine and club soda or seltzer. Serve cold.

This recipe for White Sangria doesn't have brandy in it. I wanted this version to be simple and light with a hint of fruit so the only extra ingredient is club soda.

White Sangria

Recipe

Ingredients

1 sliced peach

1 sliced mango

1 sliced red apple

1 sliced Granny Smith apple

1 plum

1 sliced pear

1 cup lemon club soda

2 bottles of white wine

Method

In a large pitcher or serving container combine fruit, club soda and wine. Serve cold.

Rose Sangria

Recipe

Ingredients

2 cups fresh strawberries sliced

2 cups fresh blackberries

1 lemon sliced

1 cup fresh pineapple cut into chunks

1 cup brandy

1 cup lemon club soda or seltzer

2 bottles rose wine

Method

Pour brandy over fruit in a large pitcher or serving container. Add wine and club soda. Serve cold.

*Notes

~ Feel free to chop your fruit into smaller pieces if you would like to add it to the glasses for serving. I used larger slices of fruit in these recipes because I liked how it looked in a larger container.

~ If you have time it's a great idea to soak the fruit in the brandy and/or wine mixture before you serve it. The flavor gets better as things marinate. You can marinate the fruit for a couple of hours or overnight. Then add the club soda just before serving.

~ You will notice I don't add sugar to my Sangria. I don't think it's necessary but if you want to sweeten yours up you can add 1/2 cup or so of sugar to any of the recipes.


Photos by Leslie Reese and Tara D'Aloisio